
Ever dreamed of giving your kitchen a facelift in a single weekend, without the dust, disruption, and high cost of a full-blown remodel? That's exactly what the best peel and stick flooring offers. It's become a secret weapon for savvy homeowners in Georgia looking for a fast, stylish, and wallet-friendly update.
Why Peel and Stick Flooring Is Such a Smart Choice
The best way to think about peel-and-stick flooring is like a high-performance, super-durable sticker for your floor. It's a brilliantly simple concept that delivers clean, surprisingly tough results. We'll walk you through everything you need to know, from picking the right kind to getting a professional-looking finish that really lasts.
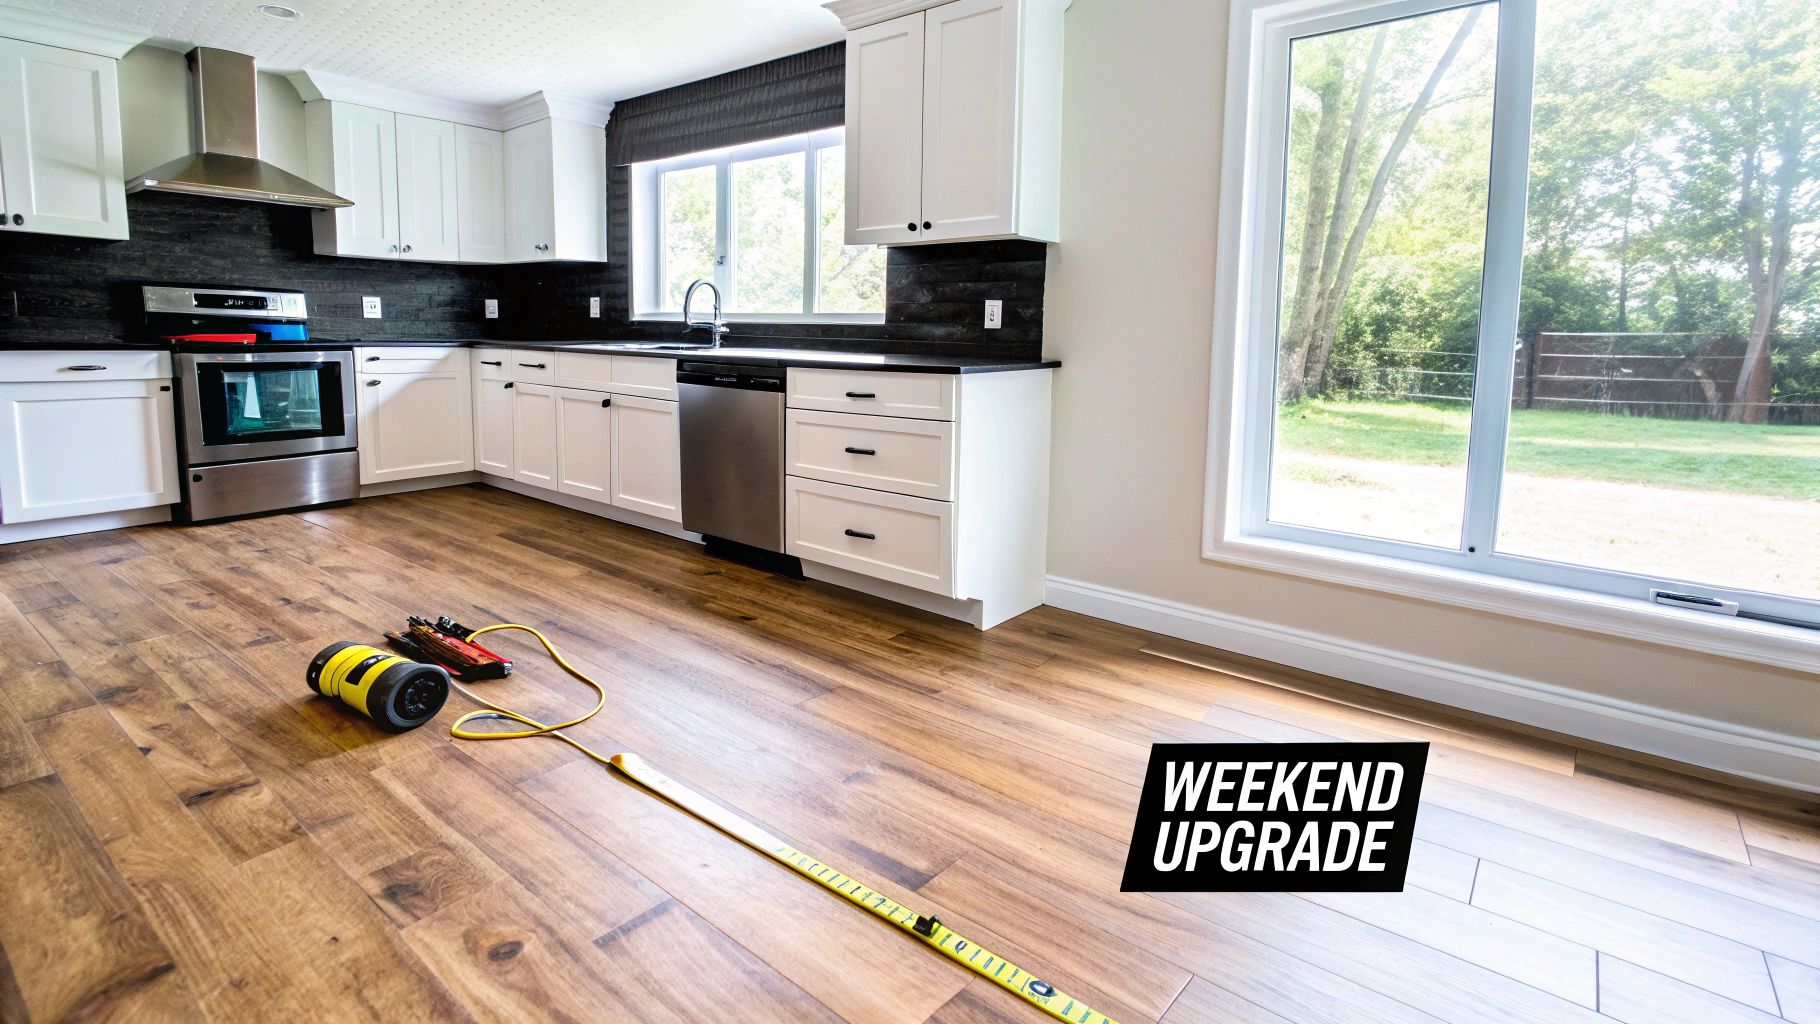
The real beauty is its simplicity. Forget about mixing grout, spreading thin-set, or renting special tools. These vinyl tiles and planks come ready to go with adhesive already on the back. Just peel away the paper and press them firmly onto a clean, smooth subfloor.
That straightforward, DIY-friendly process is why it’s exploding in popularity. A homeowner in Cumming, GA, can completely change the look of a room without hiring a crew. It's no surprise the global market for self-adhesive tiles hit USD 4.7 billion in 2023 and is projected to keep growing by 8.2% each year, all thanks to homeowners wanting accessible ways to renovate.
The Core Benefits for Your Home
So, what makes this flooring such a game-changer? It really comes down to a handful of key advantages that speak to everyone from homeowners and renters to contractors on a tight schedule.
- Affordability: You'll spend a fraction of what you would on traditional hardwood or ceramic tile, freeing up your budget for other parts of your project.
- Ease of Installation: No need for messy glues, grout, or heavy-duty saws. For most jobs, a good utility knife and a measuring tape are all you need.
- Versatility: The designs today are incredible. You can find options that realistically mimic the look of natural wood, slate, marble, and even decorative ceramic tiles, fitting any style you can imagine.
- Renter-Friendly: It’s a perfect temporary flooring for renters who want to customize their space without losing their security deposit.
The real magic of peel and stick is its ability to deliver instant gratification. You can start with a dated floor in the morning and have a completely new look by the end of the day—a feat nearly impossible with other flooring types.
How to Spot Quality Peel and Stick Flooring (and Avoid the Junk)
Let’s be honest: not all peel and stick flooring is created equal. There's a world of difference between the cheap, flimsy tiles that peel up in a month and the high-quality planks that can genuinely last for years. Knowing what to look for can save you a ton of frustration and money down the road.
Think of it like buying a car. You wouldn't just look at the paint color, right? You'd check what's under the hood. For peel and stick flooring, the "engine" is its wear layer.
The All-Important Wear Layer
The wear layer is a completely clear, tough-as-nails top coating that acts as a bodyguard for your floor. It’s what stands between your floor's beautiful design and the daily chaos of life—scuffs, scratches, spills, and stains.
This layer's thickness is measured in mils (which is just a thousandth of an inch). It's a tiny measurement, but it makes a huge difference.
- 6-10 mil: This is entry-level. It’s perfectly fine for a closet, a pantry, or a guest room that rarely sees action. It's easy on the wallet but won't stand a chance against heavy foot traffic.
- 12-18 mil: Now we're talking. This is a solid middle ground, great for places like bedrooms, home offices, or a finished basement. It strikes a nice balance between durability and cost.
- 20+ mil: This is the gold standard. For the real workhorse areas of your home—the kitchen, entryway, hallways, or the main family room in a busy Cumming household—a 20 mil wear layer is what you want. No compromises.
A thick wear layer is your floor's best defense. It's the one thing that ensures your investment can handle dropped keys, sliding chairs, pet claws, and kids' toys without looking tired and worn out.
What It's Made Of Matters, Too
Beyond that protective topcoat, the core material of the plank or tile is critical. The undisputed champion here is Luxury Vinyl Tile (LVT) or Luxury Vinyl Plank (LVP). There's a reason LVT now makes up a massive 68.34% share of the vinyl flooring market in the US.
People love it because it’s waterproof, incredibly durable, and can look shockingly similar to real hardwood or stone—often for 40-60% less money. You can dig deeper into these numbers by checking out the latest vinyl flooring market reports.
Here are a few other quality markers to keep an eye on:
- Total Plank Thickness: While the wear layer protects the surface, a thicker plank (think 4mm or more) just feels more solid and substantial under your feet. It also does a much better job of hiding minor bumps or dips in your subfloor.
- The "Stick" Factor: The quality of the adhesive is everything. A weak adhesive is a recipe for curling corners and shifting planks. Stick with reputable brands that offer a solid warranty—it’s a good sign they trust their own product to stay put.
- Indoor Air Quality: We spend a lot of time indoors, so the air we breathe matters. Look for products certified as low-VOC (Volatile Organic Compounds) to keep your home's environment healthier. If you're curious, this is a great resource for understanding what to know about low-VOC vinyl flooring.
To make it a bit easier, here’s a quick cheat sheet.
Peel and Stick Quality At a Glance
This table breaks down the key quality markers to help you match the right product to the right room in your home.
| Quality Factor | Budget Option (e.g., 6 mil) | Mid-Range Option (e.g., 12 mil) | Premium Option (e.g., 20 mil+) |
|---|---|---|---|
| Best For | Low-traffic closets, pantries | Bedrooms, home offices, basements | Kitchens, hallways, entryways, living rooms |
| Durability | Light-duty, prone to scuffs | Good for moderate daily use | Excellent, handles heavy traffic & pets |
| Feel Underfoot | Thinner, less substantial | More solid and comfortable | Rigid, feels like a permanent floor |
| Cost | Most affordable | Moderate investment | Highest initial cost, best long-term value |
By paying attention to the wear layer, the overall thickness, and the brand's reputation, you can confidently choose a peel and stick floor that not only looks amazing the day you install it but continues to perform for years to come.
Matching Your Flooring to Each Room's Demands
Let's be honest, choosing the best peel-and-stick flooring isn't a one-size-fits-all game. The perfect choice for a quiet bedroom would get absolutely destroyed in a busy, steamy bathroom. To make sure your new floor looks great and actually lasts, you've got to match its strengths to the reality of the room.
It’s a bit like picking tires for your car. You wouldn't put slick racing tires on an SUV you drive through Forsyth County winters, right? In the same way, putting a flimsy, 6 mil flooring in a high-traffic kitchen is just asking for trouble. Every room has its own battlefield—from foot traffic to moisture.
For High-Moisture Havens
Rooms like bathrooms, laundry rooms, and basements are the ultimate test. They deal with constant humidity, splashes, and the occasional leak. In these spots, 100% waterproof vinyl isn't just a nice-to-have feature; it’s a must.
These planks are built to handle water. They won't swell, warp, or start peeling up when they get wet, which protects not just the new floor but the subfloor underneath. A "water-resistant" product might survive a small spill, but it won’t hold up to the everyday dampness of a bathroom in your Johns Creek home.
This flowchart can help you map out which flooring works best for the traffic levels around your house.
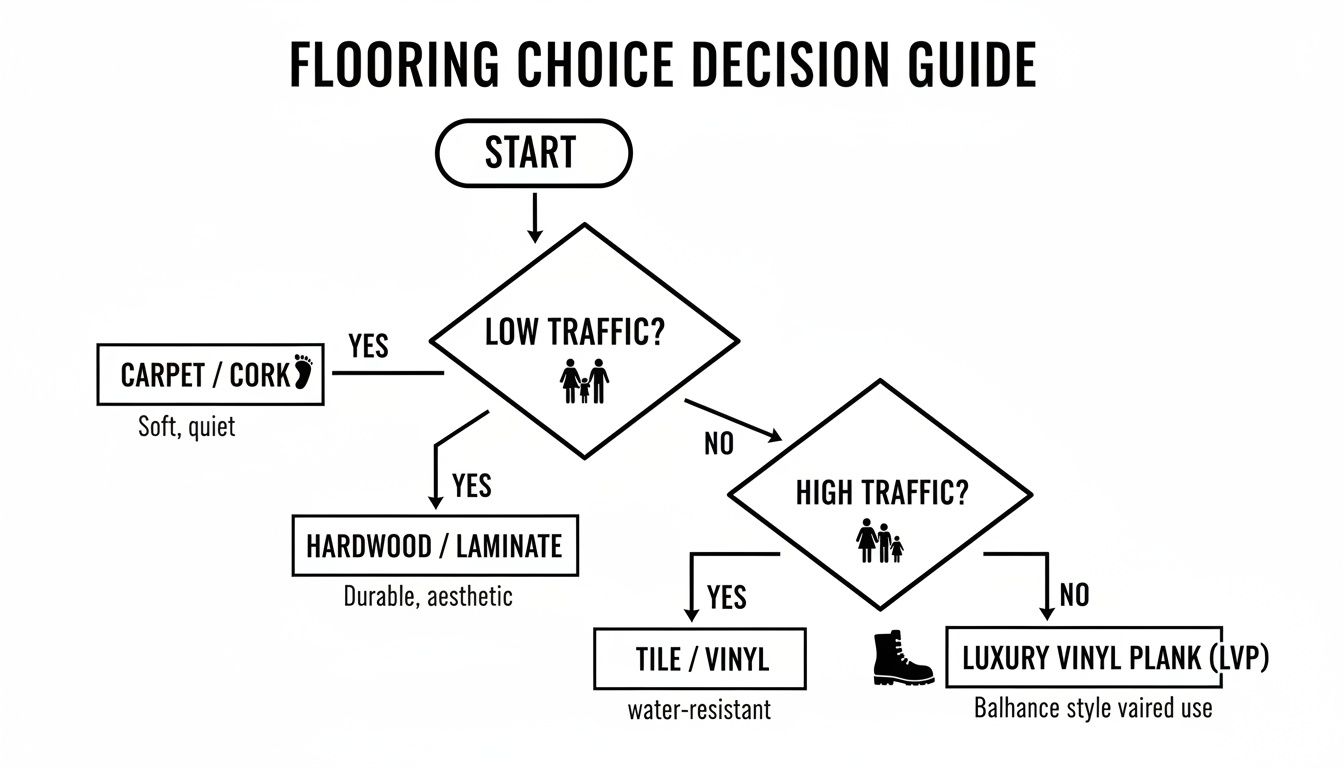
As you can see, how much foot traffic a room gets should be your number one guide when picking out the right durability.
Tackling High-Traffic Zones
Now, think about the main highways in your home. We're talking about hallways, entryways, mudrooms, and kitchens. These are the areas that take a beating from constant foot traffic, dropped grocery bags, and scraping chairs.
For these workhorse spaces, durability is everything. You need to zero in on two key numbers:
- A Thick Wear Layer: Look for 20 mil or higher. This is the invisible shield that fights off scratches, scuffs, and fading.
- Overall Plank Thickness: A beefier plank (4mm or more) not only feels more solid under your feet but also does a better job of hiding minor bumps or dips in the subfloor.
Choosing a tough, high-wear-layer product for your high-traffic zones isn't just about looks. It's a smart investment that prevents your floor from looking old before its time.
Creating Comfort in Living Spaces
Finally, we get to the fun part: living rooms and bedrooms. Here, the focus shifts from pure, rugged utility to comfort and style. These spaces see a lot less traffic and moisture, which opens up a world of design possibilities.
This is where the incredible realism of modern peel-and-stick vinyl really gets to show off. High-quality wood-look planks can bring all the warmth and class of real hardwood into your Milton bedroom, but without the cost or fussy maintenance. You can create that cozy, sophisticated vibe you're after with a floor that's both beautiful and practical enough for real life.
A Simple Step-by-Step Installation Guide
One of the biggest draws of peel-and-stick flooring is just how simple the installation can be. What looks like a major renovation project is often something you can knock out in a weekend, even with minimal experience. Let's walk through the process together.

Before you even think about peeling off a backing, get the boxes into the room where they'll be installed. Let them sit there for at least 48 hours. This step is non-negotiable—it lets the planks or tiles adjust to your home's unique temperature and humidity, preventing ugly gaps or buckling down the road.
Step 1: Prep Your Subfloor
If you only pay attention to one step, make it this one. A truly professional-looking result hinges entirely on the condition of your subfloor. It needs to be clean, totally dry, and as flat as you can get it. Every little bit of dust or grit can interfere with the adhesive, and bumps will telegraph right through your new floor.
- Get it Spotless: Start by sweeping and then vacuuming everything up. Then, give it a good mopping with a proper floor cleaner and let it dry completely. And I mean completely.
- Make it Smooth: Use a floor-leveling compound to fill in any cracks, holes, or low spots. If you're going over an old tile floor, you absolutely have to fill in the grout lines to get that perfectly flat surface.
- Prime for Adhesion: Working with a porous surface like concrete or plywood? A quick coat of latex primer made for self-stick tiles will make a world of difference in how well everything sticks.
Think of it this way: you wouldn't paint a dirty, bumpy wall and expect a smooth finish. Your subfloor is the canvas for your new flooring, and the success of the entire project depends on this foundational prep work.
Step 2: Gather Your Tools and Plan Your Layout
Good news—you don't need a professional workshop full of expensive equipment. The tool list here is short and sweet.
You'll want to have these items on hand:
- Measuring Tape: For obvious reasons!
- Utility Knife: Make sure you have a fresh, sharp blade. It's the key to clean cuts.
- Straight Edge or Carpenter's Square: This will be your guide for making those perfectly straight cuts.
- Pencil or Marker: For marking where to cut.
- J-Roller (Highly Recommended): This is the secret weapon. It helps apply even pressure to secure the adhesive bond like nothing else.
Once you've got your tools, it's smart to do a "dry fit." Lay out a few rows of planks without peeling the backing to get a feel for the pattern and find the best starting point. Most pros start from the center of the room to keep the layout looking balanced and even against the walls.
Step 3: Peel, Stick, and Press
Here comes the fun part. Grab your first plank, carefully peel away the paper backing, and line it up with your starting chalk line. Press it down firmly, smoothing it out from the center toward the edges to squeeze out any trapped air.
After you place a plank, grab that J-roller and go over it with firm, consistent pressure. This is what truly activates the adhesive and ensures your corners won't start lifting up a few months from now. For a more detailed breakdown, our guide on how to install peel and stick flooring has extra tips and tricks. Just keep repeating the process, making sure every tile or plank is snug against the last, and you'll be done before you know it.
The Real Bottom Line: Cost vs. Long-Term Value
Let's talk money, because that's where peel-and-stick flooring first grabs your attention. The price tag is hard to beat. You're typically looking at anywhere from $1 to $5 per square foot.
Compare that to traditional hardwood, which can easily start at $8 and climb to $25 per square foot before you even factor in a professional installer. The real knockout punch for your budget, though, is the DIY aspect. Professional labor can tack on an extra 30-50% to the total cost of other flooring types, and with peel-and-stick, that cost just vanishes.
For a homeowner in Johns Creek, that means you could refresh a 200-square-foot room for a few hundred dollars over a weekend, instead of shelling out thousands for a professional job. That’s a massive win.
How Long Will It Actually Last?
Okay, so it’s cheap upfront. But what about the long game? How long until it starts looking tired? The honest answer is: it depends entirely on the quality you buy and the traffic it sees.
- Budget options (around 6 mil thick): These are great for low-traffic spots like a guest closet. Expect a solid 5-7 years before they start showing their age.
- Mid-range choices (12 mil): Perfect for a bedroom or home office, these can give you a good 10-15 years of service.
- Premium LVT planks (20+ mil): When you install these top-tier options correctly on a perfectly prepped subfloor, they can last up to 25 years. That's getting into the same league as some traditional floors.
If there's one secret to making peel-and-stick last, it's this: get your subfloor perfect. A clean, dead-flat, primed surface is non-negotiable. It allows the adhesive to grab on for dear life and prevents those dreaded peeling corners down the road.
If you're weighing your options, especially against old flooring, it helps in understanding when to replace existing carpet, which can make a fresh start with peel-and-stick seem even more appealing.
Simple Care for a Floor That Lasts
The best part? You don't need a PhD in floor care to keep peel-and-stick vinyl looking great. A little common sense goes a long way.
Forget special equipment or fancy chemicals. Just follow a few basic rules. First, put felt pads under all your furniture legs—this is the single best way to prevent scratches and gouges. Second, wipe up spills right away. This keeps moisture from having a chance to seep between the seams.
When it's time for a proper clean, just stick with a simple, pH-neutral floor cleaner. Anything too harsh or abrasive can mess with the adhesive over time. Same goes for steam mops—they're a no-go here. A quick mop with a gentle cleaner is all it takes to protect your floor and your investment for years to come.
When It’s Time to Call in a Pro
Let's be honest, the big appeal of peel-and-stick flooring is the DIY-friendly installation. But even the best DIY projects have their limits. Sometimes, calling in a professional isn't just a good idea—it's the smartest move you can make to protect your investment and get a result you'll love for years. Think of it as insurance for your floor.
The absolute number one reason to bring in an expert? Your subfloor. If the surface you're laying the planks on is a mess—severely uneven, cracked, or showing any signs of moisture damage—stop right there. This is a non-negotiable professional job. They have the right equipment and know-how to properly prep that foundation, and a bad subfloor is the single biggest reason peel-and-stick installations fail.
Scenarios That Warrant an Expert Eye
So, when should you pick up the phone? A few situations definitely benefit from a seasoned hand.
- Tricky Room Layouts: Got a room with weird angles, curved walls, or a big kitchen island plopped in the middle? Those intricate cuts take a lot of skill and patience to get just right.
- Massive Spaces: Laying flooring across a huge, open-concept area is more complicated than it looks. Keeping the pattern perfectly aligned over that much space requires a level of precision that only comes with experience.
- You're Short on Time (or Confidence): If you're looking at the prep work and feeling overwhelmed, or you just don't have a free weekend to dedicate to it, hiring a pro is a great choice. A team like Flacks Flooring can knock out the job efficiently and give you a flawless finish without the headache.
Bringing in a professional isn't giving up; it's making a strategic decision to guarantee your beautiful new floor looks and performs its best for its entire lifespan.
If you decide your project needs a professional touch, using an ultimate contractor hiring checklist is a great way to find the right partner for your home in Cumming or Johns Creek.
Got Questions? We've Got Answers.
Even for what seems like a simple project, you're going to have questions. It's only natural. Getting the right answers is what gives you the confidence to know you're making a smart choice for your home. Here are some of the most common things we hear from homeowners around Cumming.
Can I Just Put This Right Over My Old Floor?
More often than not, the answer is a resounding "yes," and that's a huge part of the appeal. You can absolutely lay the best peel and stick flooring right on top of any clean, smooth, and dead-level surface. Old vinyl, linoleum, and even a properly prepared concrete slab are perfect candidates.
That said, there are a few definite no-gos:
- Floors with heavy texture: Those bumps and deep grout lines will telegraph right through the new vinyl.
- Cushioned vinyl: The "squish" from the old floor will keep the new one from ever sticking properly.
- Floating floors: You can't put a peel-and-stick floor over something like laminate or LVT that isn't glued down. The base just isn't stable enough.
And if you're thinking about going over old ceramic tile? You have to fill in those grout lines first. A little bit of floor leveler creates that perfectly flat canvas you need for the adhesive to get a good, permanent grip. No shortcuts here!
Is This Stuff Really Waterproof?
This is probably the number one question we get, especially for kitchens, bathrooms, and laundry rooms. The short answer is yes—most quality peel-and-stick vinyl is 100% waterproof. This means the planks or tiles themselves won't swell, warp, or fall apart if they get wet. Spills and splashes are no match for the material.
But there's a crucial difference between "waterproof" and "water-tight." While the vinyl itself is safe from water damage, the seams between each piece are only water-resistant. A tight, professional-looking installation is key to stopping standing water from eventually working its way down to your subfloor.
How Big of a Headache Is It to Take Out Later?
Here’s another big win for peel-and-stick: it's incredibly easy to remove. It’s a world away from the hassle of tearing out old floors that were nailed down or bonded with heavy-duty glues.
The process is pretty simple. You just need a heat gun (a hairdryer works in a pinch) to warm up a plank and soften the adhesive. From there, a putty knife is all it takes to lift a corner and peel the whole piece back. You might have some sticky residue left over, but a standard adhesive remover will take care of it. This makes it a fantastic option if you’re looking for a temporary fix or just love switching up your home's style every few years.
Ready to see some options in person or need a pro's opinion on a tricky subfloor? The team at Flacks Flooring has been helping homeowners in Cumming, Johns Creek, and Milton find their perfect floor for years. Come on down to our showroom or schedule your in-home consultation today.