
When it comes to cleaning laminate wood floors, the best method is a straightforward two-part dance: first, a dry clean to get rid of all the loose stuff, followed by a damp mop with the right cleaner.
If you remember one thing, let it be this: use as little water as possible. Too much moisture is the mortal enemy of laminate, leading to ugly, permanent damage like swelling and warping.
Your Quick Guide to Flawless Laminate Floors
Laminate gives you that gorgeous hardwood look without all the fuss, but it has its own set of rules. You can’t just treat it like any other floor. Unlike solid wood, laminate is a composite product made of multiple layers. If you want to dive deeper, you can learn more about what laminate flooring is and see why its construction demands a specific cleaning routine.
The key thing to know is that while the top layer is tough, water can sneak into the seams between the planks. Once it hits the core board, it’s game over. That’s why you have to ditch the harsh cleaning methods. Never, ever use a steam mop—the high heat and moisture can literally cause the floor to peel apart. The same goes for sloshing a traditional wet mop around; that water will find its way into the cracks and cause bubbling and swelling that you simply can’t fix.
Do’s and Don’ts for Laminate Care
To make it easy, I’ve broken down the core principles for keeping your laminate looking its best. Think of this as your cheat sheet for a long-lasting, beautiful floor.
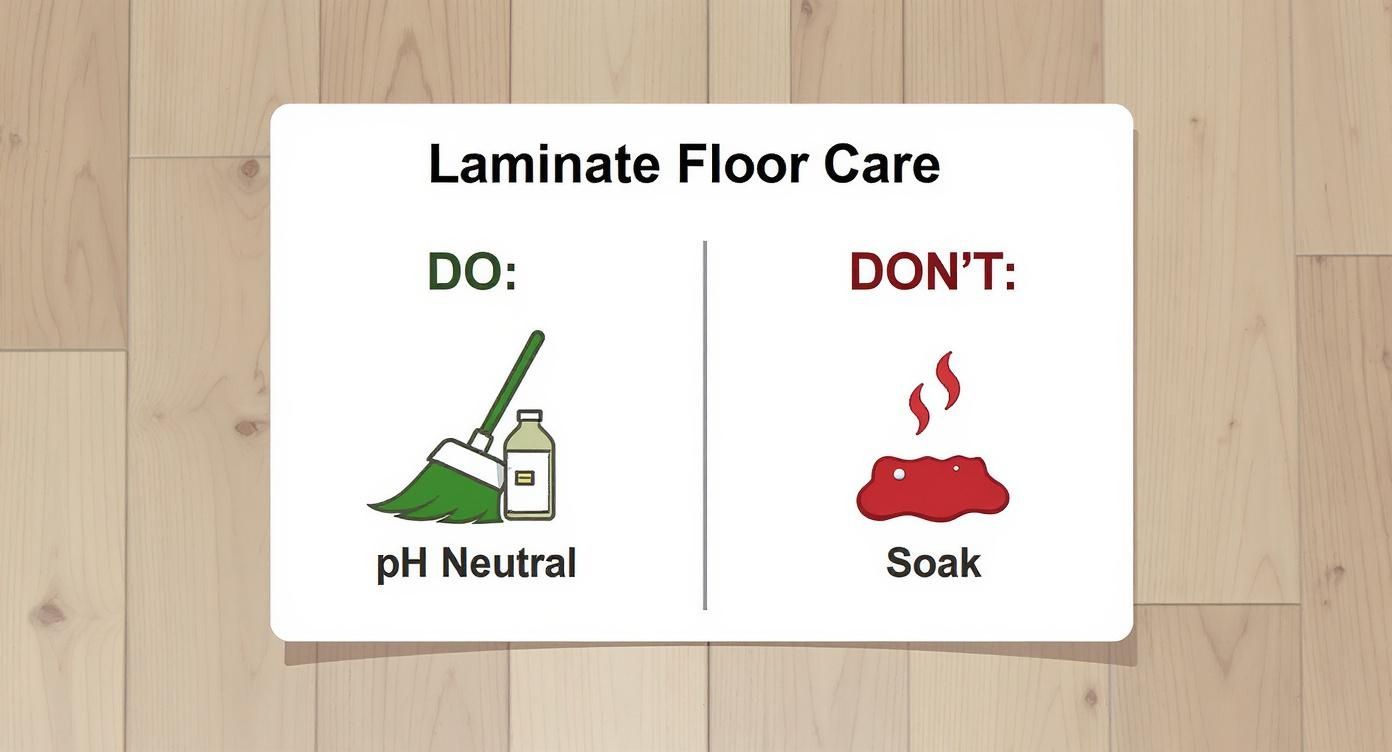
The infographic above really drives home the point: gentle methods are in, and harsh, wet practices are out.
I see this all the time—people treat their new laminate floors just like old-school tile or vinyl. That’s the biggest mistake you can make. Too much water or the wrong kind of cleaner will strip the finish and cause damage you can’t undo.
When it comes to laminate, “less is more” is truly the best philosophy.
To avoid these pitfalls, here’s a quick reference guide comparing the right and wrong ways to care for your floor.
Laminate Floor Cleaning Do’s and Don’ts
| What You Should Do (The Right Way) | What You Should Avoid (The Wrong Way) |
|---|---|
| Use a microfiber mop or soft-bristle broom for daily sweeping. | Never use a beater bar on your vacuum; it can scratch the finish. |
| Spot clean spills immediately with a slightly damp cloth. | Don’t let spills sit. Liquid can seep into the seams quickly. |
| Use a pH-neutral, laminate-specific cleaner. | Avoid harsh chemicals like bleach, ammonia, or abrasive cleaners. |
| Always use a well-wrung-out mop. It should be damp, not wet. | Never use a steam mop or saturate the floor with water. |
| Place doormats at entrances to trap dirt and grit. | Don’t use wax or polish; they leave a dull, streaky film. |
Keeping this table in mind will save you a lot of headaches and help your floors stay in pristine condition for years to come.
Ultimately, your best defense is a good offense. Get into the habit of sweeping or vacuuming (with the brush roller turned off) a few times a week to pick up grit that can scratch the surface. When it’s time for a deeper clean, a microfiber mop is your go-to tool. It cleans incredibly well with just a tiny bit of moisture, which is exactly what your laminate floors need to thrive.
Putting Together Your Laminate Cleaning Toolkit
Before you even think about mopping, let’s talk about gear. Honestly, getting a perfect, streak-free finish is less about elbow grease and more about having the right tools for the job. The whole point is to get rid of dirt and grime without scratching the finish or letting a drop of excess water seep in.
Your daily go-to for dust and debris should be either a soft-bristle broom or a vacuum cleaner. If you’re using a vacuum, this part is critical: make sure it has a hard floor setting that disengages the beater bar. That stiff, spinning brush is fantastic for carpets but it will absolutely wreck the protective layer on your laminate over time, leaving it dull and scratched.
The Right Mop and Cleaner Makes All the Difference
When it’s time for a proper wash, a good microfiber mop is your best friend. Forget those old-school string mops that just push dirty water around and soak your floors. Microfiber pads are designed to grab onto grime with very little moisture, which is exactly what you need to protect the core of your laminate planks.
As for the cleaning solution, you’ve got a couple of great options:
- Store-Bought Cleaners: Grab a cleaner that’s specifically made for laminate flooring and says pH-neutral right on the label. With the global laminate floor cleaner market valued at around USD 3.21 billion, there are plenty of effective, purpose-built products out there. You can dig into the data and see the full floor cleaner market analysis to see just how popular they are.
- A Simple DIY Mix: If you prefer to make your own, it couldn’t be easier. Just mix a quarter-cup of plain white vinegar and a single drop of dish soap into a gallon of warm water. The vinegar cuts through grime without being too harsh, and that tiny bit of soap helps lift any greasy spots. If you’re leaning toward green cleaning, there are plenty of other natural floor cleaning solutions to explore, too.
No matter which cleaner you go with, remember that less is more. Never, ever spray the cleaner directly onto the floor. Instead, lightly mist the microfiber mop pad itself. This one small habit prevents liquid from pooling and seeping into the seams, protecting your floor for the long haul.
The Perfect Technique for a Streak-Free Clean
Alright, you’ve got the right tools and cleaning solution ready to go. Now, let’s talk about technique. Getting that perfect, streak-free finish isn’t about brute force or scrubbing harder; it’s about being methodical and smart to protect your floors.
Before you even think about mopping, you have to prep the surface. If you skip this, you’re just creating a gritty, abrasive paste that can scratch the finish on your laminate. So, grab a soft-bristle broom or your vacuum—just make sure the beater bar is turned off—and get every bit of dust, hair, and dirt off the floor.
Make sure to get into those corners and along the baseboards where dust loves to congregate. A clean slate is essential for the next steps.
Mastering the Damp Mop Method
Now for the mopping itself. Whether you’re using a store-bought cleaner or a DIY solution, the number one rule is never spray it directly on the floor. This is a classic mistake. Instead, lightly mist your microfiber mop pad. This simple change gives you total control over how much moisture actually touches the planks.
Your mop pad should be damp, not wet. Wring it out thoroughly until it feels almost dry. This is genuinely the most important habit you can develop to stop water from getting into the seams of your floor, which is what leads to swelling and damage over time.
I see this all the time: people mopping in random circles, which is a recipe for streaks. For the best results, always mop in the same direction the planks are laid. This lets the mop glide smoothly and keeps cleaning solution residue from settling in the tiny grooves of the finish.
Start in the farthest corner of the room and work your way back towards the door. It sounds obvious, but it prevents you from tracking footprints all over your clean floor.
The Professional Finishing Touch
Want that truly flawless, just-installed look? Don’t let the floor air dry. Even with a properly wrung-out mop, the tiny bit of moisture left behind can lead to spots or a dull haze.
The secret is to go over the floor one last time with a completely separate, clean, dry microfiber cloth or mop head. This quick final pass does two critical things:
- It instantly absorbs any lingering trace of moisture.
- It buffs the surface to a beautiful, even sheen.
This final buff is what separates a good-enough job from a professional-looking one. It’s a quick step that makes all the difference in achieving that perfect, streak-free shine.
Dealing With Tough Stains and Scuffs

No matter how careful you are, life happens. A dropped marker, a streak from a shoe, or a bit of grease can leave you staring at a stubborn spot on your beautiful floor. The trick is knowing how to treat these specific messes without reaching for a harsh chemical that could strip away your floor’s protective finish.
You’d be surprised what you can accomplish with simple household items. I’ve seen countless dark shoe scuffs disappear with just a basic pencil eraser. A little gentle rubbing is often all it takes to lift the mark completely.
Quick Fixes for Common Stains
When a damp cloth just isn’t cutting it, you need to get a little more specific. Before you try any of these methods, I always recommend testing them on a hidden spot first—like in a closet or under a sofa—just to be safe.
Here are a few of my go-to solutions for specific stains:
- Ink or Marker: Put a small amount of rubbing alcohol on a clean cloth and gently dab the stain. Never pour it directly on the floor, as it can seep between the planks.
- Grease, Crayon, or Tar: A cloth lightly dampened with mineral spirits works wonders here. Gently lift the spot, then wipe the area with a clean, water-dampened cloth to clear any residue. Dry it right away.
- Chewing Gum or Wax: Don’t try to scrub it. Instead, harden it by placing an ice cube in a plastic bag over the spot. Once it’s brittle, you can carefully pop it off with a plastic scraper or an old credit card.
The demand for easy-to-use cleaning products is huge, which makes sense given how popular hard surfaces like laminate have become. You can read more about the rise of convenient floor care products and see just how big this market is getting.
My number one rule for spot cleaning: always work from the outside of the stain toward the center. This stops you from spreading the stain and making a small problem a big one.
With these targeted, gentle methods, you can tackle tough spots with confidence and keep your laminate looking fantastic for years.
Smart Habits for Floors That Last
The secret to keeping laminate floors looking great isn’t just about how you clean them—it’s about what you do every day to stop dirt and damage before they even start. A few simple habits can make a world of difference, cutting down your cleaning time and protecting your investment.
Think of doormats as your floor’s first line of defense. A good, high-quality mat at every entrance will catch the vast majority of the grit, dirt, and moisture that gets tracked in on shoes. This simple step alone prevents the tiny, abrasive particles that can scratch and dull your floor’s finish over time.
Another absolute must-have? Felt pads on all furniture legs. Seriously, don’t skip this. Every time a chair gets pushed back or a table gets nudged, it risks leaving a permanent scratch. These little felt circles are cheap, easy to apply, and let your furniture glide smoothly without gouging the surface.
Stop Damage in Its Tracks
Let’s be real—spills are going to happen. The key is how quickly you react.
The number one rule with laminate is to clean up spills the second they happen. Laminate’s inner core is incredibly vulnerable to moisture. If liquid is left to sit, it can easily seep between the planks, causing them to swell, bubble, or warp. Even newer, more water-resistant floors have their limits. For options that offer more protection, you can check out our reviews of waterproof laminate flooring.
The most important thing you can do to prevent costly water damage is to act fast. Keep a soft, absorbent cloth nearby and blot up any liquid immediately.
Finally, think about your home’s climate. Big swings in humidity can make laminate planks expand and contract, which might lead to ugly gaps or buckling down the road. Keeping your indoor humidity relatively stable, especially as the seasons change, helps your floor stay flat and secure for years. This kind of mindful home care is part of a larger trend, as more people now opt for eco-friendly cleaning products. You can learn more about how this is changing the market in this report on sustainable floor cleaners.
Answering Your Top Laminate Floor Care Questions
Even after you’ve got a routine down, a few questions always seem to pop up. Let’s clear the air on some of the most common ones I hear from homeowners so you can tackle your floors with complete confidence.
Can I Use a Steam Mop?
This is probably the number one question I get, and the answer is an emphatic no. It’s tempting to think that steam equals a deep clean, but for laminate, it’s a recipe for disaster.
Steam mops blast hot, high-pressure moisture into the seams between the planks. That water gets forced down into the fiberboard core, causing it to swell up, peel, and separate. This kind of damage is irreversible and almost always voids the manufacturer’s warranty. Stick to a damp mop—it’s much safer.
How Often Should I Be Cleaning?
There’s no magic number here; it really comes down to your lifestyle and the traffic your floors see every day.
- Busy Homes: If you’ve got kids, pets, or just a lot of people coming and going, you’ll want to grab a dust mop or vacuum every 1-2 days. This keeps abrasive grit and dust from scratching the surface. Plan on a proper damp mopping session once a week.
- Quieter Spaces: For low-traffic homes or rooms that don’t see much action, dust mopping a couple of times a week is plenty. You can probably get away with damp mopping every other week.
The key is consistency. A little bit of cleaning on a regular basis does far more for your floor’s lifespan than letting dirt pile up for a big, aggressive scrub-down later.
What About Using Vinegar?
Ah, the classic DIY cleaner. Is it safe for laminate? The answer is… sometimes. A very heavily diluted white vinegar solution can work, but it’s not without risks. Over time, the acidity in vinegar can start to break down and dull the protective finish on some types of laminate.
Before you make a vinegar mix your go-to solution, the absolute best way clean laminate wood floors is to consult your flooring manufacturer’s care instructions first. They know the exact chemistry of their finish. If you can’t find that info or are unsure, your safest bet is to stick with a pH-neutral cleaner made specifically for laminate floors. It’s a simple step that guarantees you won’t accidentally harm that beautiful finish you paid for.