
Let's be honest, that cold, hard cement floor is the biggest thing standing between you and a finished basement. But getting it right means starting from the ground up, and choosing the right flooring is a make-or-break decision. The best flooring for a cement basement has to be tough—it needs to stand up to moisture, feel good underfoot, and forgive any little imperfections in the concrete slab itself.
That's why options like luxury vinyl plank (LVP), epoxy coatings, and engineered waterproof flooring have become the go-to choices. They're built for the unique challenges of a below-grade space where a little dampness is always part of the equation.
Unlock Your Basement's Hidden Potential
That concrete cavern downstairs is more than just storage space; it's untapped potential. This guide is all about demystifying the process of choosing the right flooring, so you can transform that space from a damp, utilitarian area into a warm, inviting part of your home.
We’ll tackle the biggest worries homeowners face, from managing moisture to making the floor comfortable. You’ll see why prepping the concrete slab is the single most important step and get a clear, no-nonsense look at the modern flooring solutions designed to thrive below ground.
Think of this as your starting point for turning a forgotten space into a valuable asset. A finished basement doesn't just add usable square footage; it can provide a significant return on your investment.
A basement remodel can recoup over 70% of its cost at resale, making it one of the smartest upgrades a homeowner can make. It adds functional living space—perfect for a family room, home office, or guest suite—without the expense of a full-scale addition.
When you're thinking about your project as an investment, it helps to see how it stacks up against other upgrades. It's always a good idea to explore the best home renovations for resale value to make sure your money is working for you.
What This Guide Covers
We'll walk you through every critical step to make sure your new basement floor is a success. Here’s what you can expect:
- Moisture Management: First, we’ll get to the bottom of why concrete gets damp and how to create a dry foundation for your new floor.
- Top Flooring Options: We’ll do a deep dive into the pros and cons of materials like luxury vinyl, epoxy, and carpet tiles.
- Slab Preparation: You'll get practical, step-by-step instructions for cleaning, leveling, and sealing your concrete.
- DIY vs. Professional Help: We’ll help you figure out if this is a project you can tackle yourself or if it’s time to call in the pros.
Let’s get started on turning that concrete basement into a beautiful, functional living space.

Why Moisture Control Is Your First Critical Step
Before you even think about colors or styles, we need to have a serious talk about moisture. When it comes to flooring for a cement basement, this is the single most important conversation. Skipping this step is like building a gorgeous house on a foundation of sand—it’s not a matter of if things will go wrong, but when.
A concrete slab, especially one sitting below ground, acts a lot like a giant, rigid sponge. It has a natural tendency to pull moisture right out of the damp soil surrounding it through a process called wicking. This invisible water vapor is always on the move, creeping upward. Once it gets under your floor, it can destroy adhesives, cause planks to swell and buckle, and create the perfect environment for mold and mildew. That's when you get the musty smells and poor air quality that can turn a dream renovation into a nightmare.
Understanding Where Basement Moisture Comes From
To get the upper hand on moisture, you first have to know where it's coming from. Basement dampness isn't a single issue; it typically stems from a few usual suspects. Pinpointing the source in your home is the key to picking the right fix.
- Hydrostatic Pressure: This is a fancy term for water in the surrounding soil being pushed against your foundation by gravity. After a heavy rain, this pressure can force water through even the tiniest cracks or unsealed joints in your concrete, sometimes leading to actual puddles on the floor.
- Condensation: Ever notice how a cold glass of iced tea "sweats" on a hot day? The same principle applies to your basement. When warm, humid air makes contact with your naturally cool concrete walls and floor, the air rapidly cools and releases its moisture right onto those surfaces.
- Vapor Diffusion (Wicking): As I mentioned, concrete is porous. Even without any visible cracks, water vapor can migrate straight through the slab from the ground. It’s a slow but constant process that can keep the concrete perpetually damp to the touch.
Trying to ignore these forces is a recipe for disaster. Any flooring you install over a damp slab is at risk, which is why dealing with moisture is a non-negotiable part of the prep work. You can dive deeper into choosing the right materials by checking out our complete guide to the best waterproof flooring for basements.
The Non-Negotiable Role of Vapor Barriers
Your first line of defense is a vapor barrier, also called a moisture barrier. This is usually a simple sheet of plastic, like a 6-mil polyethylene, that gets laid directly over the concrete slab before any other layers go down. Its job is simple but absolutely critical: it physically blocks that rising water vapor from ever reaching your floor.
Think of it as a raincoat for your concrete. Without it, moisture gets trapped underneath your beautiful new floor, creating a dark, damp space that mold loves. It’s a very inexpensive step that protects a very significant investment.
Tackling moisture isn’t just about protecting your flooring—it's about protecting your home's structural integrity and your family's health. A dry basement prevents the musty smells and poor air quality associated with mold and mildew growth.
For many installations, especially those using adhesives, we also rely on liquid-applied sealers. These products are rolled on just like paint and cure to form a seamless, waterproof membrane that bonds directly to the concrete, offering another powerful layer of protection.
Preparing the Slab with Cementitious Solutions
Even after the slab is sealed, the surface itself needs to be perfectly smooth and stable for the new floor. This is where cementitious flooring products come in. This category includes things like self-leveling compounds and screeds that are essential for getting a cement basement floor ready.
These solutions work wonders, creating a surface that is perfectly flat, strong, and ready to accept any type of flooring you choose. The market for these materials is huge for a reason—valued at USD 1.23 billion in 2024 and expected to hit USD 1.76 billion by 2030. Their growth is a testament to how effective they are in creating durable, moisture-resistant surfaces. You can explore more on this trend and the cementitious flooring market on techsciresearch.com.
At the end of the day, controlling moisture isn't just a suggestion; it's the bedrock of a successful basement flooring project. By understanding where the dampness comes from and putting the right barriers and prep work in place, you can ensure your new floor will not only look fantastic but will last for years to come.
Comparing The Top Basement Flooring Options
Choosing the right flooring for your cement basement is where practicality meets personality. You need something that can stand up to the unique challenges of a below-grade space, but you also want it to look and feel great. Let's walk through the most popular and effective options, looking at how they handle moisture, wear and tear, and comfort.
Before we dive into materials, it's crucial to know where your basement stands on the moisture front. This simple flowchart is a great starting point.
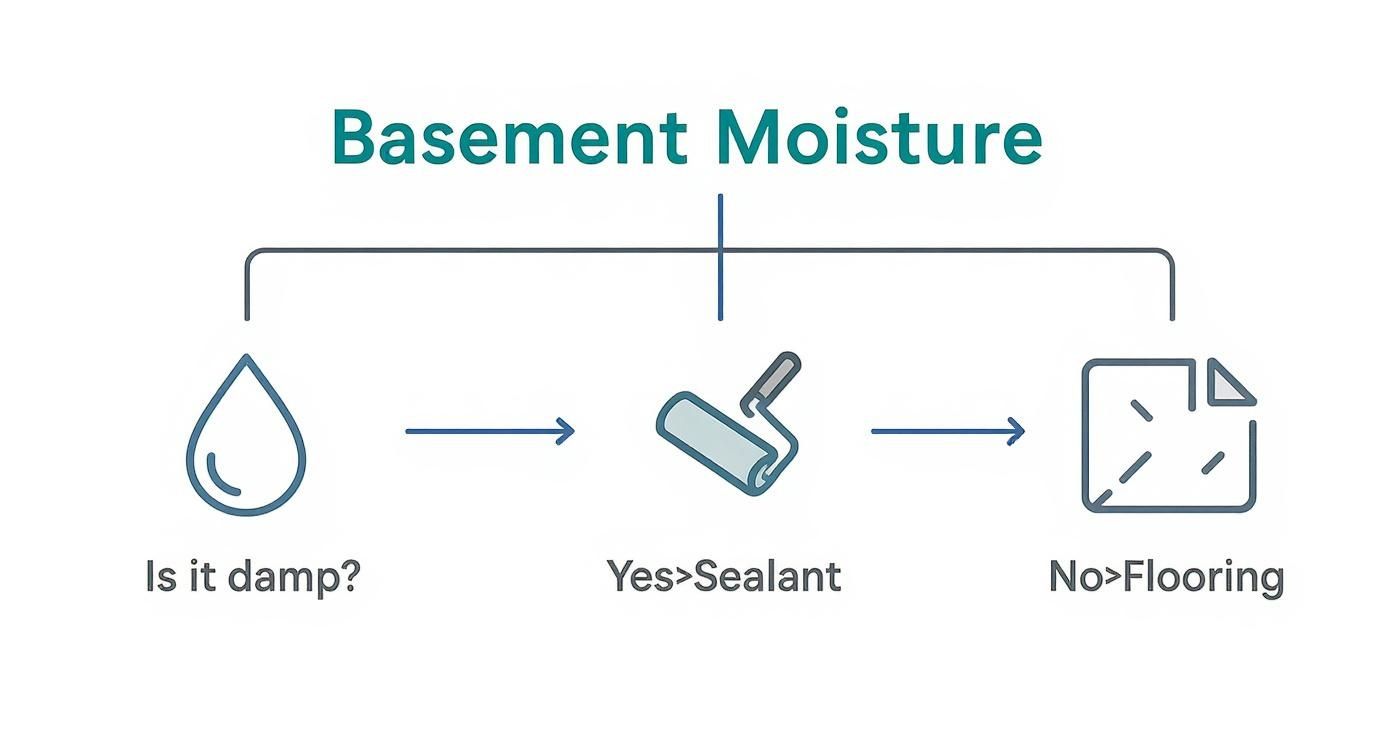
The takeaway here is simple but non-negotiable: always tackle dampness by sealing the concrete before you even think about putting down your final floor. Once that's handled, you're ready to explore the materials that will thrive on that prepared surface.
Luxury Vinyl Plank (LVP): The All-Around Champion
Luxury Vinyl Plank, or LVP, is the reigning champ of basement flooring for a lot of good reasons. It’s a synthetic material that’s 100% waterproof, which means it’s totally unfazed by the dampness that can seep up through a concrete slab. It simply won't swell, buckle, or fall apart.
But it’s not just about function. LVP is a style chameleon. Thanks to modern printing technology, it can look convincingly like real hardwood, stone, or tile, giving you a high-end finish without the maintenance headaches. The planks click together to create a "floating floor" that isn't glued down, a smart design that makes it more forgiving over slightly uneven concrete and allows the floor to breathe.
If you're curious about the specifics, we have a guide that answers the question, what is luxury vinyl plank flooring?
Key Takeaway: For most basements, LVP hits the sweet spot between waterproofing, durability, and style. Its resilience and massive design selection make it a safe, attractive, and long-lasting investment.
While it's tough, LVP isn't indestructible—a super-heavy piece of furniture or a sharp object can leave a mark. That said, its built-in protective wear layer makes it more than capable of handling the daily chaos of a busy family space.
Epoxy Coatings: The Seamless And Durable Solution
If you're leaning toward a modern, industrial, or minimalist vibe, an epoxy coating is a fantastic choice. This isn't just paint. It’s a two-part resin that’s applied as a liquid and cures into a rock-hard, seamless surface. By bonding directly with the concrete, it creates an impermeable shield that’s completely resistant to moisture, chemicals, and stains.
Epoxy is incredibly tough—it's what they use in commercial garages for a reason. That same durability is perfect for a high-traffic basement that might be a workshop, home gym, or utility area. You can even customize the finish with different colors, metallic pigments, or decorative flakes for a unique, high-gloss look that’s also a breeze to clean. Just know that proper surface prep is everything for a successful, long-lasting application.
Engineered Hardwood: Warmth With Better Stability
Lots of homeowners dream of having that classic hardwood look in their basement, but traditional solid wood is a disaster waiting to happen down there. It just can't handle the moisture. Engineered hardwood, on the other hand, is a much better bet. It's constructed with a thin top layer of real hardwood fused to multiple layers of plywood.
This layered structure makes it much more stable than solid wood, so it’s less likely to warp with humidity swings. Still, it is a wood product and is by no means waterproof. To even consider it, you need a bone-dry concrete slab and a top-notch vapor barrier underneath. We only recommend engineered hardwood for basements in areas like Forsyth County or Johns Creek that have a proven track record of being consistently dry.
Rubber Flooring: The Ultimate In Comfort And Safety
Planning a home gym, a kids' playroom, or a workshop? Rubber flooring is an outstanding option. It comes in interlocking tiles or big rolls and provides amazing shock absorption, which is a lifesaver for your joints during a workout and a great cushion for tumbles.
Rubber is naturally water-resistant and built like a tank, easily shrugging off dropped weights and heavy equipment without a scratch. The interlocking tiles are especially great for a DIY project over concrete, as they can hide minor imperfections in the subfloor. And if one tile ever gets damaged, you just pop it out and replace it. While its look is more functional than decorative, its comfort and safety are second to none for these specific uses.
Carpet Tiles: Softness And Practicality Combined
Old-school, wall-to-wall carpet is a huge gamble in a basement. It acts like a sponge, trapping moisture and becoming a breeding ground for mold and mildew. Interlocking carpet tiles are a much smarter way to get that soft, warm feeling underfoot. These squares are usually made with synthetic fibers and a waterproof backing, making them far better at handling potential moisture.
Their real genius is their modularity. If a tile gets stained or damaged by a minor leak, you just lift it out and swap in a new one. It's a simple, inexpensive fix compared to replacing an entire room's worth of carpet.
Basement Flooring Comparison Chart
To make things a little easier, here's a quick-reference chart that breaks down the pros and cons of these top contenders.
| Flooring Type | Moisture Resistance | Durability | Comfort Level | Best For |
|---|---|---|---|---|
| Luxury Vinyl Plank (LVP) | Excellent (Waterproof) | High | Moderate | All-purpose living areas, playrooms, home offices |
| Epoxy Coating | Excellent (Waterproof) | Very High | Low (Hard surface) | Gyms, workshops, utility areas, modern living spaces |
| Engineered Hardwood | Low-Moderate | High | High | Dry basements used as dens or living rooms |
| Rubber Flooring | High (Water-Resistant) | Very High | Very High (Cushioned) | Home gyms, playrooms, workshops |
| Carpet Tiles | Moderate-High | Moderate | High | Bedrooms, family rooms, home theaters |
Every basement is different, but this comparison should help you narrow down the field to the material that best fits your space and lifestyle. For more ideas, you might find this guide on the 7 best basement flooring options helpful for a broader perspective.
How to Prepare Your Concrete for New Flooring
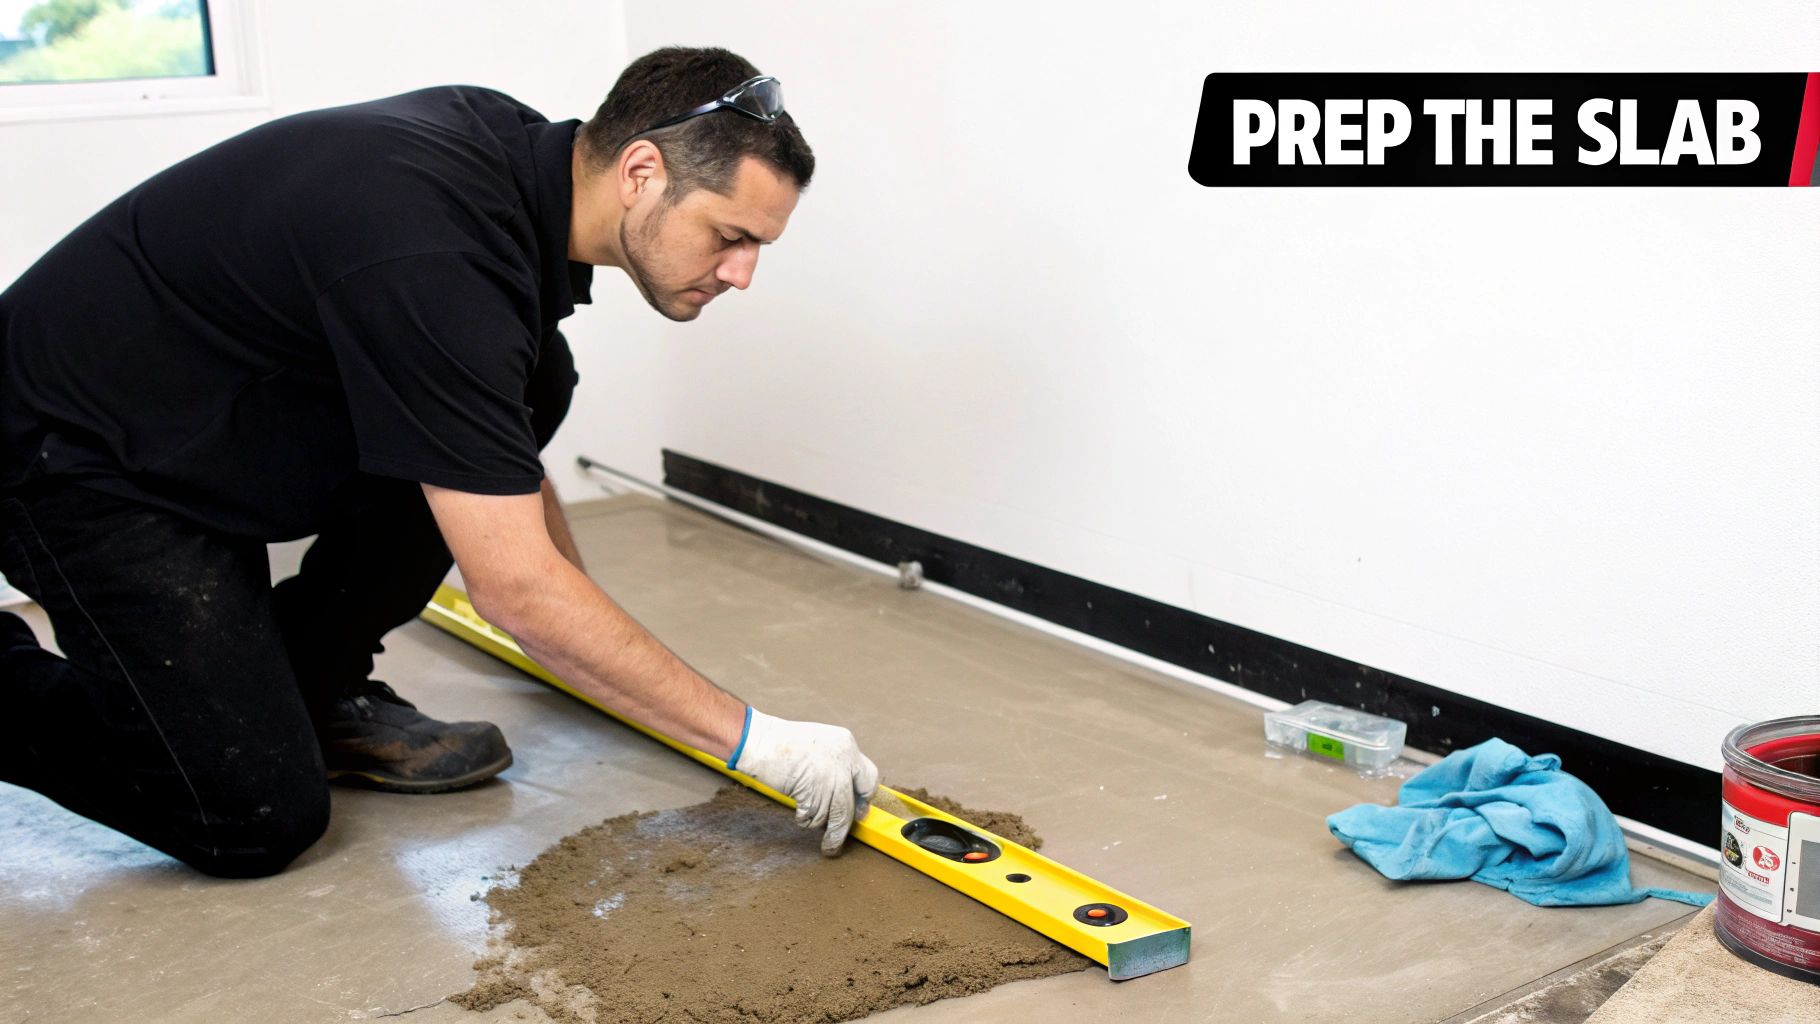
Think of installing a new basement floor like painting a masterpiece. You wouldn't start on a dirty, cracked canvas, would you? The same logic applies here. The success and lifespan of your beautiful new floor depend almost entirely on what's happening with the concrete slab underneath.
Getting the prep work right is the non-negotiable first step. It’s what ensures your new flooring has a stable, dry, and perfectly flat surface to call home. If you skip this part, you're setting yourself up for buckling planks, peeling coatings, and moisture problems that will ruin your investment. Let's walk through the essential prep work that turns a raw slab into a flawless foundation.
Start With a Deep Clean and Degrease
First things first: your concrete slab needs to be spotlessly clean. Over the years, concrete soaks up all sorts of things—oils, old paint, adhesive residue, and general grime. These contaminants will stop sealers and new glues from getting a proper grip, which is a recipe for failure down the road.
Start by giving the entire floor a thorough sweep and vacuum. Next, get to scrubbing with a heavy-duty degreaser and a stiff-bristled brush, especially if the basement was ever used as a workshop or utility space. Rinse the floor completely and let it dry for at least 24-48 hours before you do anything else.
Conduct a Simple Moisture Test
Before you even think about sealing the floor, you need to find out how much moisture is wicking up through the concrete. There’s a simple but surprisingly effective way to do this: the plastic sheet test.
- Cut a Square: Grab a 2×2 foot square of clear plastic sheeting (at least 4-mil thick is best).
- Tape it Down: Use heavy-duty duct tape to securely tape down all four edges of the plastic to the concrete.
- Wait and Watch: Now, just leave it alone for at least 24 hours.
- Check for Condensation: After a day or so, peel back the plastic. If you see water droplets on the plastic's underside or notice the concrete is darker beneath it, you have a moisture issue. This means a powerful sealer or vapor barrier is a must.
Repair Cracks and Level the Surface
Let's be honest, no concrete slab is perfect. Most will have small cracks, little pits, or low spots that can create real headaches for rigid flooring like LVP. The goal here is a surface that is perfectly flat and smooth.
Start by filling any non-structural cracks and holes with a concrete patching compound. For bigger dips or uneven sections, a self-leveling compound is your best friend. You mix this cement-based product into a liquid, pour it over the low spots, and it naturally spreads out to create a perfectly flat surface as it cures.
A perfectly flat subfloor isn't just a "nice to have" for modern flooring; it's a requirement. Many flooring manufacturers specify that the floor can't vary by more than 3/16 of an inch over a 10-foot span. A self-leveling compound is often the only way to meet that standard and avoid problems later.
Getting a slab perfectly flat can be tricky. If you're looking at significant dips and crowns, it’s worth checking out a detailed guide on how to level uneven floors to make sure you get it right.
Apply a Waterproofing Sealer
This is your final—and most important—line of defense against moisture. Applying a high-quality waterproofing sealer or a liquid-applied vapor barrier is absolutely essential for any flooring for a cement basement. These products soak into the concrete's pores and create an impermeable membrane, effectively blocking water vapor from rising through the slab.
You’ll roll the sealer on just like paint, making sure you get complete, even coverage. Most products call for two coats to get the job done right. Always follow the manufacturer’s instructions to the letter, especially when it comes to cure times. Rushing this step can trap moisture and undermine the entire project, so let that sealer cure fully before you even think about laying down your new floor.
DIY Installation vs. Hiring a Professional
So, you’ve picked out the perfect flooring for your cement basement. Now you're facing the big question: should you roll up your sleeves and install it yourself, or is it time to call in a pro? The right answer really hinges on a few things—how complex your chosen flooring is, the current state of your concrete slab, and frankly, how comfortable you are with this kind of work.
Getting this choice right is what separates a rewarding weekend project from a costly, drawn-out headache.
For many homeowners, the appeal of a DIY project is huge. There's a real sense of pride in doing it yourself, and of course, you can save a good chunk of change on labor costs. This is a totally realistic path if you've chosen a flooring system that was literally designed for homeowners to install.
But let's be honest—hiring a professional offers a level of polish and peace of mind that’s tough to replicate. They show up with specialized tools, a deep understanding of how to handle basement moisture, and usually, a warranty to back up their work.
When DIY Makes Sense
Going the DIY route works best when the stars align: the right flooring, the right basement conditions, and the right homeowner. If your concrete is already in pretty good shape—meaning it’s relatively level and dry—and you’re using a straightforward product, you’ve got a great shot at success.
Consider tackling the job yourself if you're installing:
- Click-Lock Luxury Vinyl Plank (LVP): These planks are practically made for DIYers. They just snap together without any messy glue or special tools.
- Interlocking Carpet Tiles: Much like LVP, these modular squares are incredibly easy to lay out and connect. You can create a cozy, carpeted feel in an afternoon.
- Rubber Gym Tiles: If you're building a home gym, these heavy-duty tiles are a no-brainer. They fit together like big puzzle pieces and are built to take a beating.
Pro Tip: Even with the most user-friendly materials, prep work is king. You absolutely cannot skip cleaning, patching, and sealing the concrete. A shoddy foundation will ruin even the simplest flooring installation.
When to Call a Professional
Sometimes, calling a professional isn't just a good idea—it's the only smart move. Pros have seen it all when it comes to quirky basements and know how to handle the unexpected. Their expertise can save you from critical mistakes that could cause your beautiful new floor to fail in just a few years.
Hiring a pro is almost always the right call for:
- Epoxy Coatings: Applying epoxy isn't like painting a wall. It's a precise chemical process that demands intense surface prep (think concrete grinding) and perfect mixing. There’s very little room for error.
- Engineered Hardwood: This flooring is gorgeous, but it's also finicky. It requires a perfectly flat subfloor and an expert touch to manage expansion gaps and keep moisture locked out.
- Seriously Uneven Concrete: If your slab has major dips, high spots, or ongoing moisture issues, a pro is your best bet. They have the self-leveling compounds and heavy-duty equipment to get it right. Plus, a warranty-backed installation is worth its weight in gold when you're dealing with a tricky subfloor.
At the end of the day, it's about being realistic about the project's demands versus your own skills, tools, and available time. For a simple LVP or carpet tile job on a good slab, DIY can be a huge win. But for trickier materials or a challenging concrete situation, a professional installer ensures your new flooring for a cement basement will last and look fantastic for years to come.
Keeping Your New Basement Floor Looking Great for the Long Haul
You've got a beautiful new floor in your basement, and the hard part is over. Now, it's all about keeping it that way. Protecting your investment doesn't mean a ton of work; it just means getting into a simple, smart routine that keeps your basement healthy and looking sharp for years.
The first line of defense is always going to be tackling the basement's oldest enemy: moisture. Running a dehumidifier, especially during those notoriously humid Georgia summers, is non-negotiable. This one simple step works wonders to keep the indoor environment stable, warding off the kind of persistent dampness that can eventually cause problems for any flooring for a cement basement, even the waterproof kind.
A Little TLC Goes a Long Way: Cleaning Tips for Your Specific Floor
Every flooring material has its own quirks, and using the right cleaning methods is crucial. The wrong cleaner can easily strip a protective finish or leave the surface looking dull and lifeless.
- Luxury Vinyl Plank (LVP): Always grab a pH-neutral cleaner. Anything too harsh or acidic can eat away at that all-important wear layer, making your floor susceptible to scuffs and fading down the road.
- Epoxy Coatings: This is as easy as it gets. A quick pass with a dust mop for daily upkeep and an occasional wash with a gentle mix of diluted ammonia and water will maintain that beautiful shine. Just steer clear of vinegar or other acidic cleaners—they will absolutely dull the gloss.
A few good habits can make a world of difference, too. Put felt pads under the legs of all your furniture. Seriously, don't skip this. It's the single best way to prevent scratches on any hard surface floor. And if your basement has a walk-out entrance, a good doormat is your best friend for catching dirt and grit before it gets tracked all over your new floor.
Taking care of your floor isn't just about looks—it's about protecting the value of your entire basement renovation. A little consistent, simple care is what makes your investment truly pay off.
Remember, underneath it all is that concrete subfloor, the foundation of the whole system. Just to give you an idea of how critical this material is, the global market for cast-in-place concrete flooring was valued at a staggering USD 6.55 billion in 2024. Taking proper care of the flooring on top is the best way to protect that essential base. You can read more about the growth of the concrete flooring market to see just how important it is in modern construction.
Answering Your Top Basement Flooring Questions
Even with all the options laid out, a few questions always come up when you're standing on that bare concrete slab, trying to decide. Getting these answers right can be the difference between a project you're proud of for years and one that causes headaches down the road.
We’ve pulled together the most common questions we hear from homeowners to give you that final bit of clarity before you commit.
Can I Just Put Flooring Down on My Uneven Concrete?
This is probably the number one question we get, and the honest answer is: it's complicated. A little bit of character in the slab is one thing, but major hills and valleys are a deal-breaker for most modern flooring. Rigid floors, especially luxury vinyl, need a flat, stable surface to click together securely and stay that way.
Here’s a practical way to think about it:
- Slightly Uneven: If your floor has dips of less than 3/16 of an inch over a 10-foot stretch, you can usually get away with it. A good underlayment will absorb some of these minor imperfections.
- Seriously Uneven: Anything more than that, and you absolutely have to level the concrete first. A self-leveling compound is your best friend here; it does the hard work of creating a perfectly smooth canvas for your new floor.
Trying to skip this step is just asking for trouble. You'll end up with floors that creak, bounce, and eventually come apart at the seams.
Is a Vapor Barrier Really Necessary Under the Floor?
Yes. 100% yes. For almost any flooring for a cement basement, this is a step you cannot afford to skip. Concrete looks and feels solid, but it's porous like a sponge. It’s constantly wicking moisture vapor up from the ground, even if the surface feels bone dry.
Think of a vapor barrier as a waterproof jacket for your floor. It creates an impassable shield, stopping that relentless ground moisture from getting trapped underneath your beautiful new flooring where it can cause mold, mildew, and rot.
It's a small, inexpensive step that protects your entire investment. Skipping it is one of the most common and costly mistakes we see.
What's the Best Way to Get a Warmer Basement Floor?
That signature chill from a concrete slab can make a basement feel unwelcoming, no matter how nice it looks. If a cozy, warm feel is high on your list, a few options really stand out from the rest.
Carpet tiles are a fantastic solution. They give you the softness and insulation you want from a carpet but in a practical, moisture-resistant format that's perfect for below-grade spaces.
If you prefer a hard surface, the winning combination is LVP laid over a high-quality thermal underlayment. That extra layer acts as a buffer, breaking the direct thermal bridge to the cold concrete. The difference it makes underfoot is immediate and impressive.
Ready to find the perfect flooring solution for your basement in Cumming or Forsyth County? The experts at Flacks Flooring are here to guide you through every step, from moisture assessment to professional installation. Visit us online or in our showroom to get started.