
Yes, you absolutely can install beautiful hardwood floors over a concrete slab. It’s a project we see homeowners tackle all the time, and when it’s done right, the result is a perfect blend of modern sturdiness and timeless, natural warmth. A hardwood floor installation on concrete is a fantastic way to add character, comfort, and serious value to your home.
Why Hardwood Over Concrete Is a Smart Move

Here in Cumming and Johns Creek, a lot of homes are built on concrete slab foundations. Many people assume this limits them to carpet or tile, but that’s just not the case anymore. Installing wood floors directly onto concrete is not only possible but has become a popular and highly sought-after upgrade.
You end up with a floor that feels incredibly solid. The concrete base eliminates the squeaks and creaks you sometimes get with traditional wood subfloors. Then, when you add a quality underlayment, the floor feels warmer and more comfortable underfoot. It can completely transform a chilly basement or a ground-floor living area into a genuinely inviting space.
The Best Wood for a Concrete Subfloor
Your choice of wood is the single most important decision you’ll make for this project. While you can use traditional solid hardwood, it’s a major undertaking. You’d have to build a full plywood subfloor over the concrete first, which adds significant cost and complexity.
This is why engineered hardwood is overwhelmingly the best choice for going directly over concrete.
Engineered planks are made with a core of layered wood composite and topped with a beautiful, real hardwood veneer. This layered construction makes the wood incredibly stable. It’s far less likely to expand, contract, or warp with the temperature and moisture shifts common with concrete slabs—a huge plus, especially with Georgia’s humidity.
A lot of folks hear “engineered” and think “fake.” That’s a common misconception. Engineered hardwood is real wood, just constructed in a way that makes it tougher and more adaptable for tricky installations like this. You get the authentic look and feel of solid wood without the worry.
A Growing Trend with Proven ROI
Finishing concrete slabs with high-end flooring isn’t just a design trend; it’s a smart financial move. The North American concrete flooring market was valued at USD 2,839.7 million in 2022, and much of that serves as the literal foundation for premium finishes. With the global hardwood market reaching USD 51.38 billion in 2024, it’s clear that homeowners are investing heavily in quality surfaces for their solid concrete bases. This kind of upgrade can make a real difference in your home’s resale value. For more on the numbers, check out this analysis of the concrete flooring market.
Upgrading your floors is one of the most impactful ways to improve your home’s look and feel. The visual warmth and timeless style are just a couple of the reasons why. To dig deeper, you can learn all about the benefits of hardwood flooring in our detailed guide. At the end of the day, putting hardwood over concrete gives you a durable, elegant solution that you’ll enjoy for years to come.
What to Look For Before You Lay the First Plank
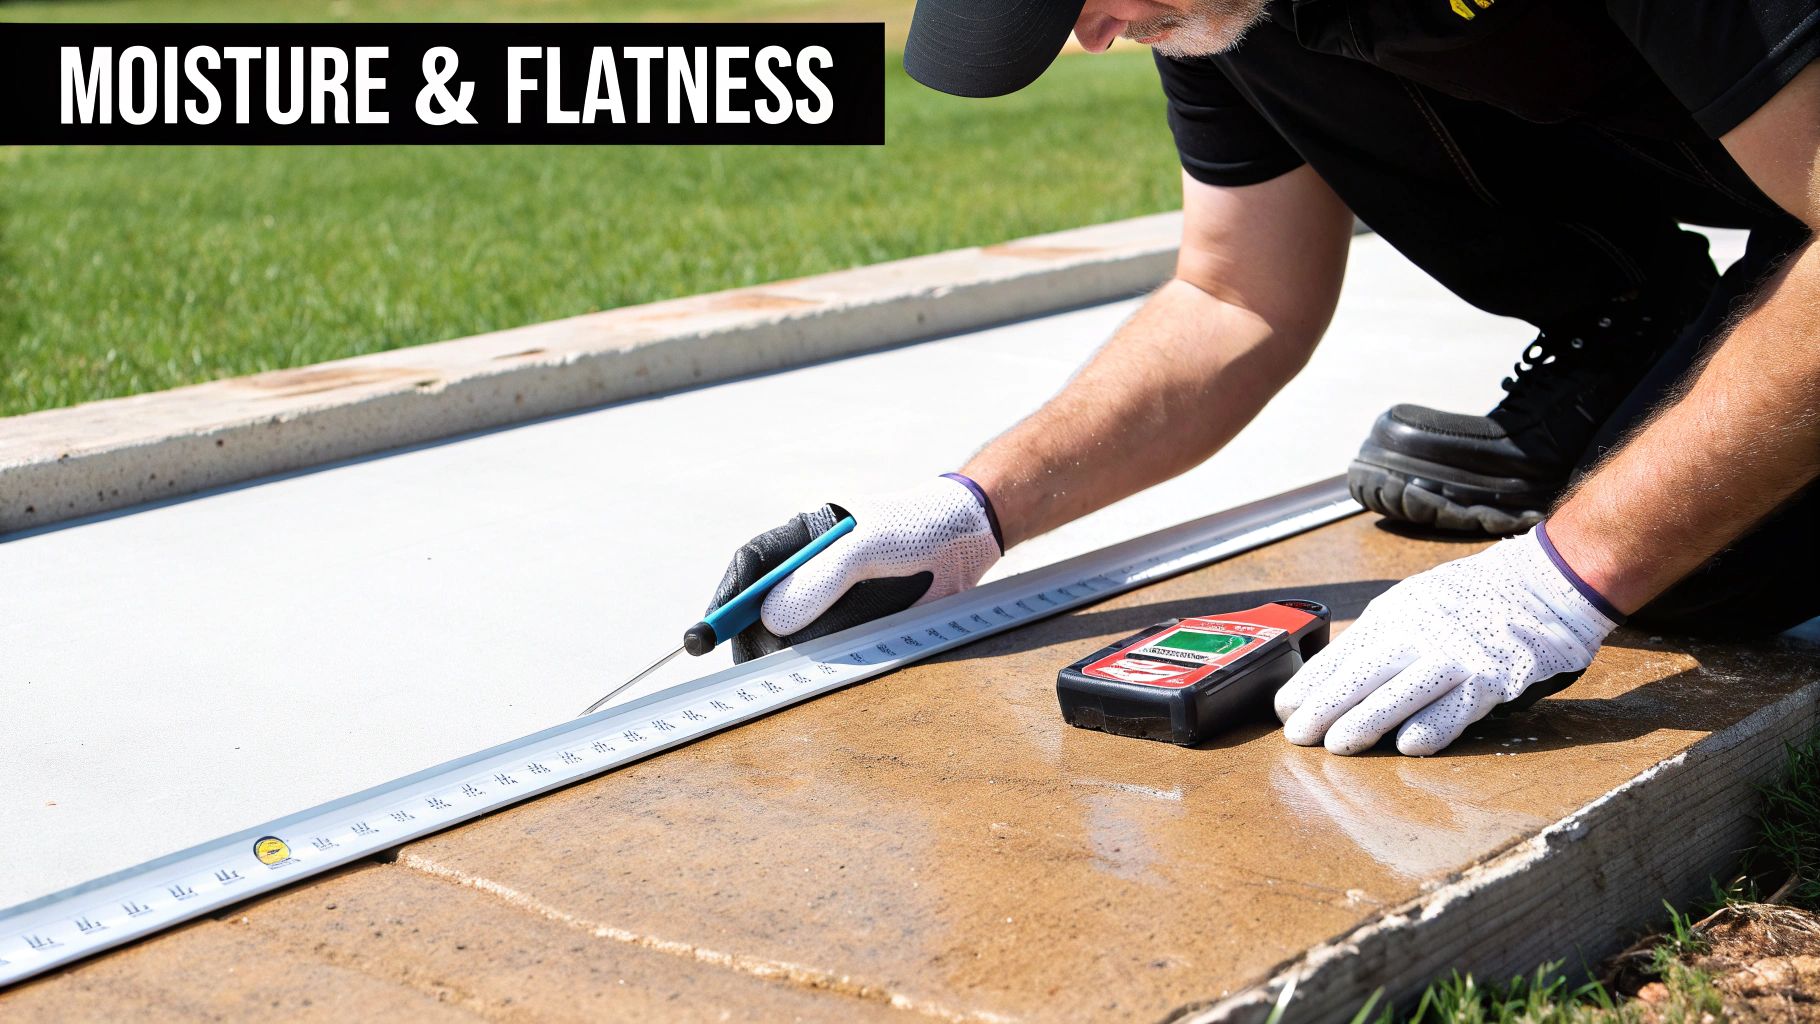
Before a single box of beautiful hardwood even crosses your threshold, you need to get intimately familiar with your concrete subfloor. Honestly, this initial assessment is the most critical part of the entire job. Nailing this step helps you dodge nearly all the common headaches—like warping, cupping, and those annoying hollow spots—that can ruin an otherwise perfect project.
The two biggest deal-breakers for any concrete subfloor are moisture and flatness. Your slab might look perfectly fine, but what you can’t see can cause catastrophic floor failure down the road. Taking the time to properly inspect and measure now is an investment that truly pays off.
The Critical Role of Moisture Testing
Think of concrete as a giant, rigid sponge. It has a knack for wicking moisture up from the ground and releasing it as vapor into your home. If that vapor gets trapped under your new hardwood, the wood will swell, buckle, and can even grow mold. This is precisely why a professional moisture test is non-negotiable.
You’ve got a few reliable options for checking moisture, from simple DIY checks to more precise professional tests.
- Plastic Sheet Test (ASTM D4263): This is a great first-pass test. Just tape an 18″ x 18″ square of clear plastic to the concrete, making sure to seal all four edges. Wait 24-48 hours. If you come back to find condensation on the underside of the plastic, your slab is likely too wet for hardwood.
- Calcium Chloride Test (ASTM F1869): This one gives you hard numbers. It measures the amount of moisture vapor coming off the slab over a 72-hour period. The result is given in pounds per 1,000 square feet, and most flooring manufacturers want to see a reading of 3 to 5 lbs or less to keep their warranty valid.
- In-Situ Relative Humidity Test (ASTM F2170): Widely considered the gold standard for accuracy. This test involves drilling a small hole into the slab and inserting a sensor to measure the internal relative humidity. A reading below 75-85% RH is generally the green light for most hardwood installations.
For homeowners in Milton or Forsyth County, dealing with Georgia’s humidity is just a fact of life. Skipping a proper moisture test here is a recipe for disaster. The high ambient humidity can easily mask how much moisture is truly coming through your slab, making a professional-grade test absolutely essential.
Ensuring Your Subfloor is Perfectly Flat
Next up: flatness. An uneven concrete subfloor creates problems no matter which installation method you choose. With a floating floor, you’ll get a bouncy, “clicky” feeling in the low spots. For a glue-down installation, you’ll end up with hollow-sounding voids where the adhesive never made contact with the wood.
To check for flatness, you need a long, dead-straight level or straightedge—something at least 8 to 10 feet long works best.
Lay it across the floor in various spots and in different directions. Keep an eye out for any gaps between the straightedge and the concrete. You can use a stack of business cards or a ruler to measure the depth of any valleys.
The industry standard is pretty strict: a tolerance of no more than 3/16 of an inch over a 10-foot span. If you find dips or high spots that exceed this, you absolutely have to correct them before moving forward.
Addressing Cracks and Contaminants
Finally, it’s time for a good old-fashioned visual inspection of the entire slab. You’re looking for anything that could interfere with a solid installation.
- Cracks: Don’t sweat the small stuff. Hairline cracks are usually fine. It’s the larger, structural-looking cracks you need to deal with, as they can be a source of moisture. These often need to be filled with an appropriate epoxy filler.
- Old Adhesives or Paint: Was the floor previously covered in vinyl, tile, or paint? Every last bit of that old adhesive or coating has to go. If you leave it, the new moisture barrier or flooring adhesive won’t bond correctly.
- Stains and Sealants: Oil stains, old curing compounds, or concrete sealers can also kill adhesion. In many of these cases, the top layer of the concrete will need to be ground down to expose a clean, porous surface that’s ready for your new floor.
Taking these prep steps seriously is what transforms your concrete slab into a worthy foundation for the beautiful hardwood you’ve chosen.
Choosing Your Hardwood and Installation Strategy
Alright, you’ve done the critical prep work on your concrete slab. Now comes the fun part: picking out the wood and figuring out the best way to lay it down. This decision goes way beyond just aesthetics. The type of hardwood you choose and how you install it will make all the difference in how your floor performs, feels, and holds up over the years.
Putting hardwood over concrete isn’t quite the same as laying it over a typical plywood subfloor. Concrete has its own set of rules—it’s hard, it can hold moisture, and it stays cool. You have to work with it, not against it.
Engineered Hardwood: The Clear Winner for Concrete
Let’s cut right to it: for a project directly over concrete, engineered hardwood is almost always the right call. While everyone loves the idea of solid hardwood, engineered planks are built for this exact scenario. They have a top layer of gorgeous, real hardwood—like the oak or hickory you love—but it’s bonded to a super-stable core made of cross-layered plywood.
That layered construction is the secret sauce. It makes the planks incredibly resistant to the expansion and contraction that humidity and temperature swings can cause. This is a huge deal when you’re dealing with a concrete slab, which is notorious for transmitting a bit of moisture vapor.
We’ve seen homeowners from Johns Creek to Milton put engineered floors in their basements and main-level living areas with fantastic results. It just handles the unique environment of a concrete slab so well, giving you that stunning solid wood look without the risk.
This isn’t to say you absolutely can’t use solid hardwood on concrete. You can, but it’s a much bigger undertaking. You’d have to build a complete plywood subfloor over the concrete first, which adds significant cost, complexity, and floor height. For most folks, the straightforward, reliable nature of engineered wood makes it the most practical choice.
If you’re still on the fence, our guide on how to choose hardwood flooring can help you dig deeper into the options.
Your Three Main Installation Methods
Once you’ve settled on engineered hardwood, you’ve got three main ways to get it onto your prepped concrete slab. Each has its own pros and cons, and the best one depends on your budget, your timeline, and whether you’re tackling this yourself.
- Glue-Down Installation: This is exactly what it sounds like. We spread a specialized adhesive directly onto the concrete and carefully set the planks into it. It creates a rock-solid bond, giving the floor a firm, quiet feel with absolutely no clicking or hollow sounds.
- Floating Installation: With this method, the planks aren’t actually attached to the concrete. Instead, they click together at the edges and “float” as a single unit on top of an underlayment pad. It’s usually the fastest and most DIY-friendly approach.
- Nail-Down Installation (with a subfloor): This is the old-school, traditional method. But for concrete, it requires adding a layer of plywood over the slab first. Then, the hardwood is nailed or stapled to that new wood subfloor—never directly into the concrete.
Hardwood Installation Methods on Concrete Compared
So, how do you pick? It really comes down to what you’re trying to achieve. A floating floor might be the perfect, budget-friendly solution for a basement den, while a glue-down installation delivers that premium, solid feel for a high-traffic family room.
This table breaks it down to help you compare them side-by-side.
| Installation Method | Best For | Pros | Cons |
|---|---|---|---|
| Glue-Down | Achieving a solid, permanent feel in high-traffic areas. | Feels incredibly stable underfoot; no hollow sounds. Excellent for sound dampening. | Less forgiving for DIYers; more expensive due to adhesive costs; repairs are more difficult. |
| Floating | DIY projects, budget-conscious renovations, and areas where slight movement is acceptable. | Faster and easier installation; more affordable; allows for easy plank replacement if damaged. | Can feel less solid; may have a slight “hollow” sound; requires a perfectly flat subfloor to avoid bounce. |
| Nail-Down | Homeowners wanting the traditional solid wood feel who are willing to invest in a subfloor. | The classic hardwood installation method; extremely durable and long-lasting. | Most expensive and complex method; adds floor height, which can affect doors and trim. |
By thinking through both the type of wood and the installation method that fits your home, you’re setting yourself up for a beautiful floor that you’ll be happy with for a long, long time.
How to Properly Prep Your Concrete Subfloor
A stunning hardwood floor is only as good as the foundation it’s built on. When it comes to laying hardwood floor installation on concrete, this prep work isn’t just a step—it’s everything. Think of it this way: you’re transforming a raw, industrial slab into the perfect canvas for a floor that should last for decades.
This whole process boils down to getting the slab meticulously clean, flat, and dry. It’s a lot like prepping a wall before you paint; any little imperfection on the surface will eventually show right through to the finished product. Trust me, skipping these critical steps is the number one reason floors fail.
Start with a Deep Clean
First things first, you need a completely clean slate. The concrete must be free of any dust, drywall compound, old paint, or leftover gunk from previous flooring. Any of that stuff will get in the way, preventing leveling compounds, moisture barriers, and flooring adhesives from grabbing onto the slab like they should.
For the easy stuff like dust and debris, a good sweep followed by a shop vacuum will do the trick. But if you’re up against more stubborn material—like old glue or splotches of paint—you’ll probably need to break out a scraper or even rent a light grinder to get back to clean, porous concrete.
Achieving a Perfectly Flat Surface
Like we’ve touched on, a flat subfloor is absolutely non-negotiable. The goal you’re shooting for is the industry standard tolerance of 3/16 of an inch over a 10-foot span. Anything more than that is a recipe for problems, from annoying bouncy spots in a floating floor to hollow-sounding voids in a glue-down installation.
Here’s how you can tackle an uneven slab:
- For Low Spots: A high-quality, self-leveling compound is your best friend here. You just mix it up to a pancake-batter consistency, pour it into the low areas, and it works its magic, smoothing itself out as it cures. It’s a remarkably effective way to fill in those dips and valleys.
- For High Spots: Got ridges or high points? A concrete grinder is the tool for that job. You can usually rent one from a local tool supplier to carefully grind down the high areas until they’re flush with the rest of the floor.
Taking the time to get the slab perfectly flat is what separates a professional-feeling installation from a DIY job that feels “off.” It’s tedious work, but you’ll feel the difference with every single step you take on the finished floor.
The Critical Step of Moisture Mitigation
Moisture is the ultimate enemy of hardwood flooring, period. Concrete is naturally porous and will wick moisture up from the ground, releasing it as vapor. If you trap that vapor under your beautiful new wood floor, you’re asking for cupping, warping, and buckling. A proper vapor barrier is essential. If you haven’t already, now’s the time for a detailed check; you can review a great guide on how to test concrete for moisture to make sure your slab is ready.
The type of barrier you’ll need really depends on which installation method you choose.
This diagram breaks down the three main installation options you’ll be considering once the subfloor is prepped.

Each method—glue-down, floating, or nail-down with a subfloor system—interacts with the concrete differently, and that directly influences your moisture strategy.
For floating floors, a simple 6-mil polyethylene plastic sheeting is often all you need. You’ll roll it out over the entire slab, making sure to overlap the seams by at least 6-8 inches. Then, tape the seams with a waterproof tape to create a continuous barrier that blocks moisture vapor.
For glue-down applications, you need a more robust solution. A liquid-applied membrane is a fantastic choice. You roll it on just like thick paint, and it cures to form a seamless, waterproof seal that also primes the surface for your flooring adhesive. It’s this impermeable bond you’re after. In fact, many of the techniques are similar to those used when painting a concrete porch, where surface prep is the key to a finish that lasts.
Choosing the Right Underlayment
Finally, let’s talk about underlayment. While some underlayments do have a built-in vapor barrier, their main jobs are a bit different. An underlayment adds some cushioning, dampens sound, and provides a thermal break between the cool concrete and your new hardwood.
- For Floating Floors: A foam or felt pad underlayment is standard. It helps smooth out minor subfloor imperfections and cuts down on that “clicking” sound when you walk. Many products made specifically for concrete slabs will come with an attached vapor barrier.
- For Glue-Down Floors: You typically don’t use a separate underlayment, since the adhesive bonds the wood directly to the sealed concrete. Some modern, all-in-one products can act as a moisture barrier, adhesive, and sound reducer all at once.
By meticulously cleaning, leveling, and sealing your concrete subfloor, you are creating the ideal foundation for a hardwood floor that will not only look beautiful but will also perform flawlessly for years to come.
Avoiding Common Pitfalls for a Lasting Floor
Even with a perfectly prepped subfloor and the best materials, a few small mistakes during the installation itself can derail all your hard work. Having spent years on hardwood floor projects in Cumming and the surrounding areas, we’ve seen it all. These are the hard-won lessons that separate a floor that looks good for a year from one that looks beautiful for decades.
It really comes down to respecting the nature of wood. Wood is a living, breathing material that expands and contracts with changes in temperature and humidity. Failing to plan for this movement is the root cause of most flooring failures.
Give Your Wood Time to Adjust
This is one of the most overlooked yet absolutely critical steps: acclimation. You just can’t take hardwood planks straight from a delivery truck and start laying them down. The wood needs time to get used to the unique climate inside your home—the specific temperature and humidity where it will spend its life.
For a successful hardwood floor installation on concrete, bring the unopened boxes of flooring into the room and let them sit for a bare minimum of 72 hours. This simple act of patience allows the wood’s moisture content to equalize with its new environment, drastically reducing the risk of unsightly gaps, cupping, or warping later on.
Think of it like letting a guitar adjust to a new room before tuning it. If you tune it right out of the case, it will be out of tune an hour later. Your flooring is the same; it needs to settle in before you lock it into place.
The Non-Negotiable Expansion Gap
Because wood moves, you absolutely must give it room to grow. This is what the expansion gap is for. It’s a small space—typically between 3/8 and 1/2 of an inch—that you leave around the entire perimeter of the room. This gap must be maintained against walls, door jambs, pipes, and any other fixed object.
This little bit of empty space is what allows the entire floor to expand and contract as a single unit without buckling or putting stress on the individual planks. Don’t worry about the look; this gap will be completely hidden by your baseboards and shoe molding, leaving you with a clean, professional finish.
Troubleshooting Common Installation Frustrations
Even with careful planning, you might run into a few issues. Knowing what they are ahead of time makes them much easier to prevent.
- Hollow Sounds (Glue-Down): Hearing hollow or “clacky” spots as you walk on a new glue-down floor is a classic sign of poor adhesive contact. This usually means the subfloor wasn’t perfectly flat or the wrong-sized trowel was used, leaving an uneven spread of glue.
- A “Bouncy” Feeling (Floating): If a floating floor feels spongy, the culprit is almost always an uneven subfloor. The planks are essentially flexing over a low spot as you walk. This is exactly why spending that extra time with a self-leveling compound is so important.
Protecting Your Investment Long-Term
Once your beautiful new floor is down, the goal is to keep it that way. In humid areas like Milton or Johns Creek, using a floating underlayment system with at least a 6-mil vapor retarder is essential. Data suggests untreated concrete moisture can warp 25% of solid wood installations within just five years.
Opting for thicker, high-quality engineered planks with a durable aluminum oxide finish can ensure your floor lasts 25 years or more with the right care. These best practices are known to cut contractor callbacks by as much as 40% simply by accommodating the concrete’s natural seasonal shifts. To learn more about flooring market trends, check out this detailed report.
Proper maintenance is pretty straightforward. Use felt pads on all furniture legs to prevent scratches and clean up spills immediately. For daily care, regular sweeping or vacuuming with a soft brush attachment is all you really need.
When it’s time for a deeper clean, stay away from harsh, chemical-based products that can strip the finish. You can learn more about choosing the right non-toxic hardwood floor cleaners to protect both your family and your new floor. By avoiding these common pitfalls, you’re setting your floor up for decades of beauty and performance.
Got Questions? We’ve Got Answers
Even the most detailed guide can’t cover every question that pops up during a big project like laying hardwood over concrete. We get it. After decades of helping homeowners around Cumming and Forsyth County, we’ve heard just about everything. Here are the answers to the questions we get asked the most.
Can You Put Solid Hardwood on a Concrete Slab?
The short answer is yes, you can, but it’s rarely a good idea. Solid hardwood is a living, breathing material that’s extremely sensitive to moisture, and you can’t just nail it down into concrete. To do it right, you have to build an entire plywood subfloor on top of the slab first.
That means you’ll be:
- Putting down a heavy-duty moisture barrier.
- Fastening sheets of plywood to the concrete.
- Nailing the solid hardwood planks into that new plywood.
Honestly, it’s a lot of extra work. It adds significant cost for both labor and materials, and it raises your floor height, which can create awkward transitions and require you to trim down every door. That’s why engineered hardwood is almost always the smarter, more reliable choice for installing directly over concrete.
What’s the Best Underlayment to Use Over Concrete?
The right underlayment is doing three jobs at once: blocking moisture, dampening sound, and providing a bit of insulation. If you’re installing a floating engineered floor, a good 3-in-1 underlayment is your best friend. It’s a single product that combines a foam or felt cushion with a built-in vapor barrier, making the whole process much simpler.
Now, if you’re gluing the floor down, you won’t use a separate underlayment pad. Instead, the magic is in the adhesive itself. Modern moisture barrier adhesives are fantastic—they act as an all-in-one solution, creating a waterproof seal while securely bonding the wood to the concrete.
One of the biggest mistakes we see is people doubling up on vapor barriers—for instance, laying a 3-in-1 underlayment over a separate sheet of plastic. This can actually trap moisture between the two layers and cause major problems. Stick with one, high-quality barrier and do it right the first time.
What Do I Do with the Baseboards and Trim?
This is what separates a DIY job from a professional finish. The best way to handle it is to carefully remove your existing baseboards and door casings before you even start laying the floor. This lets you slide the new planks right underneath the trim for a clean, seamless look with no awkward gaps.
After the floor is down—and you’ve left that crucial expansion gap around the edges—you simply reinstall the baseboards. They’ll sit right on top of the new hardwood, hiding the gap perfectly. Just a heads-up: if your new floor is much thicker than the old one, you might need taller baseboards to keep the room’s proportions looking right.
What’s the Real Cost to Install Hardwood on Concrete?
The final price tag can swing quite a bit depending on the wood you pick, the shape your slab is in, and whether you call in the pros. For a full-service engineered hardwood installation over concrete, you can generally expect to land somewhere between $8 to $15 per square foot.
So, what goes into that number?
- The Wood Itself: Engineered hardwood can run anywhere from $4 to over $10 per square foot.
- Professional Labor: Figure on adding $3 to $7 per square foot for a skilled installer.
- Slab Prep: If your concrete needs a lot of leveling or grinding, that could add another $1 to $2 per square foot.
While you can definitely save some money on labor with a DIY floating floor, investing in a professional crew often pays for itself. They have the experience to spot and fix moisture and subfloor issues that can ruin a floor down the road.
Ready to turn that cold concrete slab into a warm, beautiful hardwood floor? The team at Flacks Flooring has spent over 30 years helping homeowners in Cumming, Johns Creek, and Milton get stunning results that last. Stop by our showroom or schedule an in-home consultation today!