
To silence a creaky floor, you first have to play detective. The culprit is almost always one of three things: friction between floorboards, a gap that’s opened up between your flooring and the subfloor, or movement in the floor joists themselves.
Sometimes, a quick fix like adding powdered graphite into a seam is all it takes to solve minor friction. For more stubborn spots, securing loose boards with specialized screws can provide a lasting solution.
Why Your Floors Squeak and How to Silence Them
That persistent squeak you hear with every step is more than just a nuisance—it's your house talking to you. It’s a sign that something has shifted or settled. Often, the cause is simple friction, a totally normal result of wood expanding and contracting with the humid summers and cooler winters we get here in the Cumming and Johns Creek area.
But that squeak can also be a red flag for bigger problems, like the subfloor pulling away from the joists that support it.
Figuring out the why is the first real step toward a quiet floor. The good news is you don't need to be a seasoned contractor to get to the bottom of it. The solution might be a quick 10-minute job with something you already have, or it could be a more involved weekend project. Think of this as your roadmap to pinpointing the noise and choosing the right fix.
Finding the Right Path to a Quiet Floor
The first thing to figure out is whether you're dealing with a single, annoying spot or a symphony of squeaks across the entire room. This one diagnostic step will point you toward the most effective solution and save you a lot of headache.
This decision tree helps visualize the process: is your squeak a minor annoyance or a sign of a deeper issue?
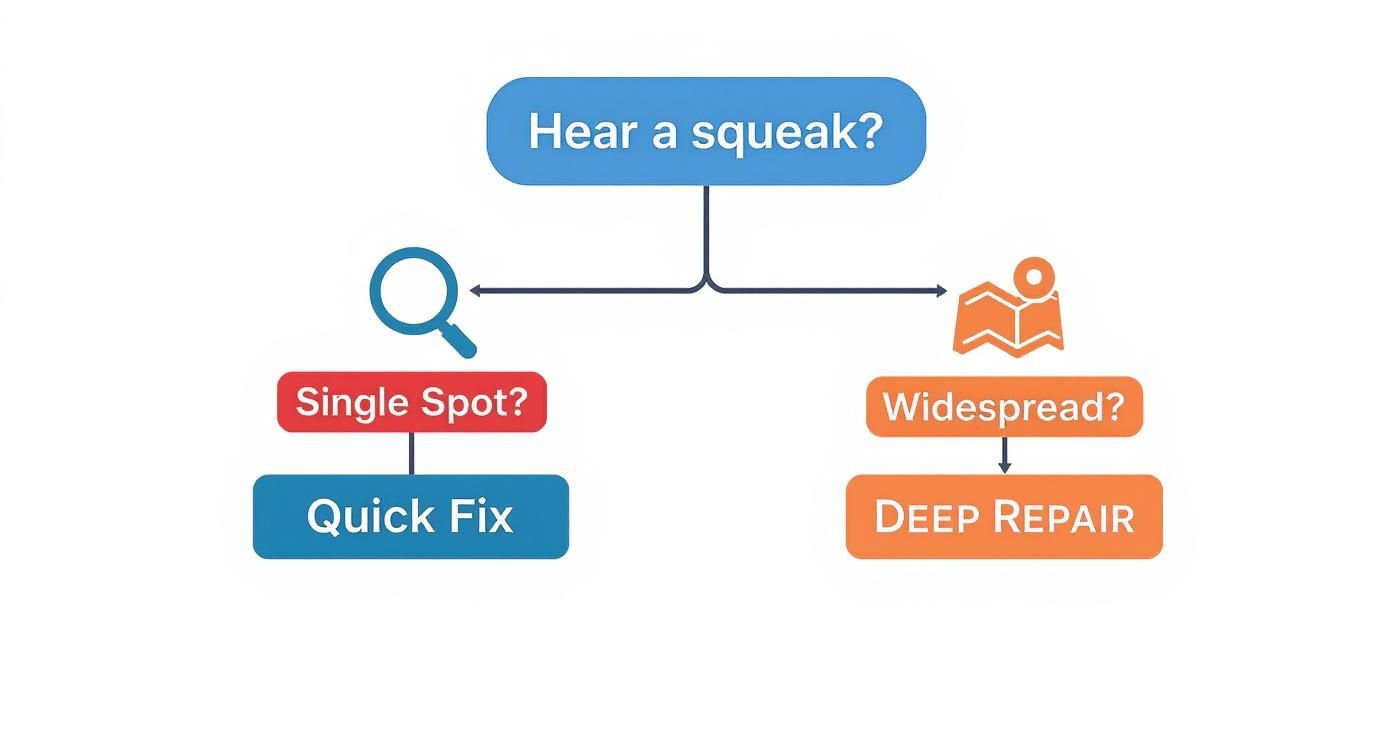
As you can see, a lone squeak usually means a quick fix is in order. Widespread noise, on the other hand, often hints at something more structural that needs attention.
To help you narrow it down, this table breaks down common symptoms and what they typically mean for repairs.
Quick Fix vs. Deep Repair: Understanding Your Options
| Symptom | Likely Cause | Typical Solution | Estimated Time |
|---|---|---|---|
| One or two small squeaks in a specific spot | Friction between floorboards | Lubricant (graphite) or shims | 10-30 minutes |
| A long creak when you walk a certain path | Loose subfloor along a joist | Driving screws from above or below | 1-2 hours |
| Widespread squeaking across a large area | Systemic issues, loose joists, or humidity | Bracing joists, major subfloor repairs | 1-2 days |
| A hollow "thump" followed by a squeak | Gap between flooring and subfloor | Injectable adhesive or screws | 30-60 minutes |
This should give you a clearer picture of what you're up against, whether it's a simple Saturday morning task or a more involved project.
The Growing Need for Flooring Repairs
If you're dealing with noisy floors, you're in good company. The global market for flooring repair is valued at $2-3 billion and continues to grow. We see this trend firsthand as homeowners in places like Milton and Forsyth County invest in older homes, focusing on restoring their structural integrity.
Tackling those squeaks isn't just about getting some peace and quiet; it’s about protecting your home’s health and value for the long haul. You can find more data on the flooring repair services market to see just how common these projects have become.
What You'll Need in Your Floor-Silencing Toolkit

Before you dive in and start silencing those squeaks, let's talk about tools. Heading into any project with the right gear isn’t just about making the job easier—it's about doing it right the first time and avoiding costly mistakes that can make things worse.
You might be surprised to find that many simple fixes only require a few things you probably already have lying around the garage. But for a repair that’s going to last, a couple of specialized items can make all the difference. Think of it as a small investment to save yourself a ton of frustration down the road.
The Everyday Essentials
For most of the quick, surface-level repairs we'll cover, your toolkit should have these staples. They’re versatile enough that you’ll use them for plenty of other projects around the house, too.
- Stud Finder: This is non-negotiable. A quality electronic stud finder is your secret weapon for pinpointing the floor joists under your floorboards. You have to know where they are to anchor your screws properly.
- Drill with Assorted Bits: A good variable-speed drill gives you the control you need for creating pilot holes and driving screws without overdoing it.
- Trim-Head Screws: Don’t just grab any wood screw. These have much smaller heads that sink cleanly below the floor’s surface, leaving a tiny, easy-to-fill hole.
- Powdered Graphite: For squeaks caused by boards rubbing together, this dry lubricant is a lifesaver. It works its way into the seams and won't attract dirt and gunk the way oil-based lubricants do.
Gear for Deeper Repairs
Sometimes, the squeak isn’t coming from the floorboards but from the subfloor or joists below. Tackling these issues means you’ll need to step up your tool game, especially if you have access from a basement or crawlspace.
Having the right pry bar can be the difference between a clean repair and a splintered floorboard. Choose a thin, flat bar specifically designed for trim and flooring work to minimize damage.
For these more involved jobs, you’ll want to add a pry bar (for gently lifting trim or boards), a circular saw for any subfloor surgery, and a tube of construction adhesive to bond the subfloor tightly to the joists. A good quality underlayment also plays a huge part in soundproofing. If you’re replacing a section of floor, take a moment to learn about the best underlay for wood flooring to stop future noises before they start.
Quick DIY Fixes for Immediate Relief
When a floor starts creaking, you don't always need to gear up for a massive overhaul. Sometimes, the most persistent squeaks can be silenced with a surprisingly simple fix you can knock out in an afternoon. These methods are perfect for tackling those common, isolated noises without needing a contractor's license.

We'll cover three of the most effective techniques I've used over the years: using dry lubricants for surface-level friction, anchoring loose boards from above with a clever kit, and strategically placing shims from below to close up gaps. Each one is a great solution for that one annoying spot—you know, the one that gives you away on a late-night trip to the fridge.
Use a Dry Lubricant for Minor Friction
The most common culprit behind a minor squeak is simply two hardwood planks rubbing against each other. Here in the Johns Creek area, humidity shifts cause wood to expand and contract, and that movement creates friction. The easiest fix? Lubricate the joint.
But hold on—don't reach for the WD-40. It's crucial to use a dry lubricant like powdered graphite or even something as simple as talcum powder. Wet lubricants can stain the wood, attract a ton of dust and grime, and ultimately make your problem worse.
Just sprinkle a little powder along the noisy seam and work it into the crack with a soft brush or even just your finger. Walk over the spot a few times to let the powder settle in deep, then wipe away any excess with a dry cloth. You'd be surprised how often this simple trick silences the noise instantly.
Secure Flooring From Above with a Specialized Kit
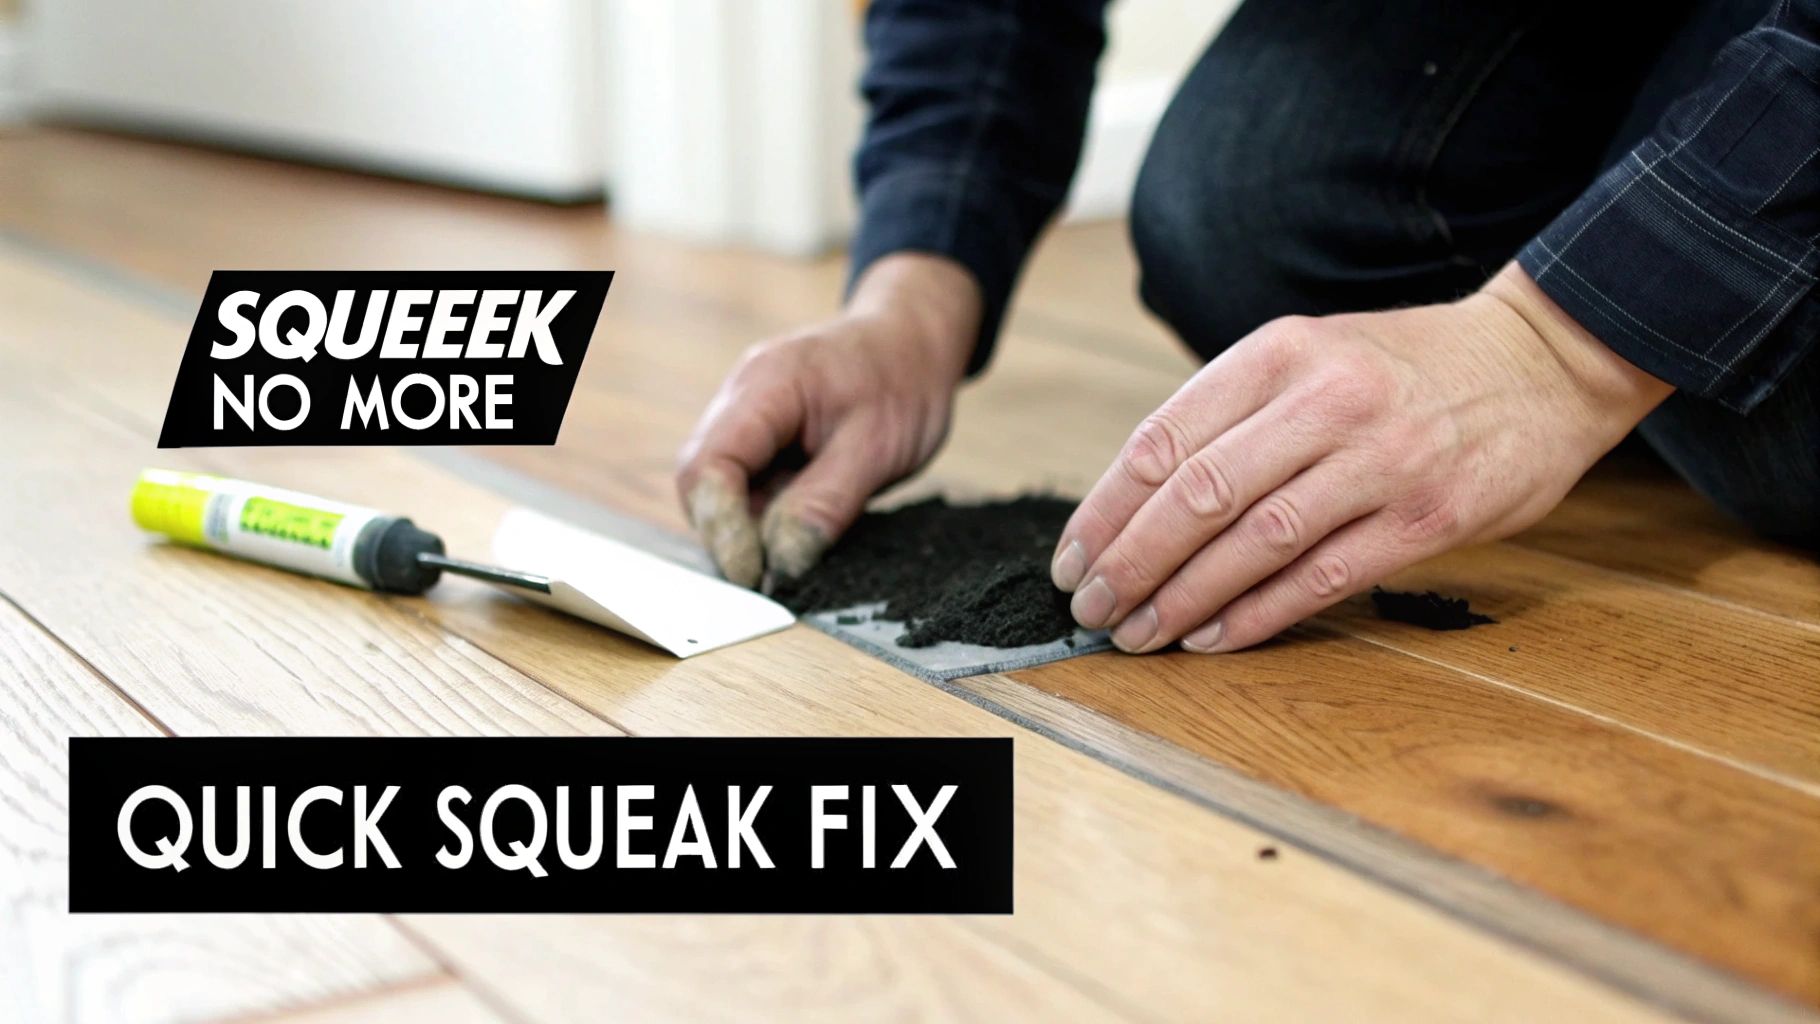
If the squeak is caused by a gap between your floorboard and the subfloor, a powder lubricant won't cut it. In this case, you need to physically fasten that loose board down. This is where a product like the Squeeeeek No More kit is an absolute lifesaver, especially if you have carpet.
These kits are brilliantly engineered. They come with special "breakaway" screws and a depth-control fixture that lets you drive a screw right through the carpet and floorboard, anchoring it to the joist below.
Here’s the really clever part:
- The fixture stops the screw at the perfect depth.
- An included tool lets you snap the screw head off below the carpet line.
- The result is a rock-solid floor with absolutely no sign of the repair.
This method is a game-changer because you can stop creaky floors without the hassle of pulling up your carpet. Just be sure to use a stud finder to locate the joist first for a solid connection.
For a lasting fix, always aim to drive screws into a floor joist. Securing a board only to the subfloor might offer temporary relief, but anchoring it to the joist provides the structural stability needed to prevent the squeak from returning.
Place Shims from Below for Gaps
Got access to the floor from a basement or crawlspace? You're in luck. This gives you the best angle for a permanent fix. Squeaks often happen because a tiny gap opens up between the subfloor and a floor joist. When you step on that spot, the subfloor deflects, rubs against the joist, and—creak.
To fix this, you just need to fill the gap with a thin wood shim.
First, have a helper walk around upstairs while you're below, listening and watching to pinpoint the exact source of the noise. You’ll probably see a tiny space open and close. Once you've found it, apply a bead of construction adhesive into the gap and gently tap a shim in until it's snug. Don't force it in so hard that you create a bulge in the floor above. The adhesive ensures a solid bond, stopping any movement for good.
Sometimes, you might also notice minor squeaks coming from loose baseboards or trim. Learning some basic caulking techniques can help you seal these small gaps and eliminate those annoying little noises around the edges of a room.
Advanced Repairs Below the Floorboards
When a small, annoying squeak starts to sound more like a room-wide groan, it’s a good sign the problem runs deeper than the floorboards. For these more persistent creaks, the real fix is often found underneath the floor, assuming you have access from a basement or crawlspace. This is where you can get your hands on the structural guts of your floor and silence those noises for good.
These more involved repairs are all about reinforcing the connection between your subfloor and the joists—the heavy beams that act as the skeleton of your floor system. It takes a bit more effort, but the payoff is a solid, silent floor that feels brand new.
Install Blocking to Stiffen Floor Joists
Over the years, especially in some of the beautiful older homes you see around Forsyth County, floor joists can start to twist or flex a little. That tiny movement is a huge source of widespread squeaking. The go-to solution here is to install blocking (also called bridging), which are just short pieces of wood wedged perpendicularly between the joists.
It’s like adding rungs to a ladder; they make the entire structure far more rigid and stop the sides from moving independently.
- Solid Blocking: You can cut 2×8 or 2×10 lumber to fit snugly between two joists. It helps to stagger them in a line so you have an easier time nailing them into place.
- Cross-Bridging: An alternative is to use smaller 1×3 or 2×2 boards to create an "X" shape between the joists. This accomplishes the same stiffening effect.
By locking the joists together and preventing them from moving, you stop the subfloor from flexing, which silences the creaks above. It’s an incredibly effective way to add some serious stability back into your flooring system.
Apply Construction Adhesive from Below
Another fantastic method is to create an ironclad bond between a loose subfloor and the joist it’s supposed to be resting on. If you can actually see a gap between the top of a joist and the bottom of the subfloor, you’ve almost certainly found your culprit.
Here's a pro tip: have someone walk on the creaky spot upstairs while you're underneath. You'll see exactly where the subfloor is moving, which lets you target the repair with surgical precision.
Once you’ve found the gap, just apply a generous, continuous bead of high-quality construction adhesive right along the top edge of the joist. The adhesive fills that void and, once it cures, essentially glues the subfloor and joist into a single, solid piece. No more movement, no more noise.
Re-Secure a Loose Subfloor
Often, the problem is just that the original fasteners holding the subfloor have worked themselves loose over time. For the ultimate fix, you can combine the power of construction adhesive with brand-new fasteners. This is how you stop creaky floors for the long haul.
After applying your bead of adhesive, drive short screws up through the joist and into the subfloor. The key here is using the right screw length—you need it to get a solid grip on the subfloor without popping through your beautiful hardwood or tile upstairs. A 1 ¼-inch screw is usually a safe length for this job.
It's worth noting that these subfloor issues can sometimes point to bigger problems with your home's foundation. Widespread unevenness, for example, is often a symptom of structural shifts. If you think that might be happening, our guide on how to level uneven floors is a great place to start. Addressing core structural issues is a key part of home maintenance, feeding into a global foundation repair market valued at around $2.72 billion in 2024. You can see more on these structural repair market trends to understand just how crucial a stable foundation is.
When to Call a Flooring Professional
DIY fixes are fantastic for silencing that one annoying squeak in the hallway. But as any experienced homeowner knows, it's just as important to recognize when a problem is bigger than your toolkit. While most creaks are harmless, some are early warning signs of a much bigger headache brewing beneath your feet.
Catching these red flags is the key to stopping a minor annoyance from spiraling into a bank-breaking structural repair.
Some jobs simply aren't cut out for a weekend warrior. If you're dealing with widespread creaking across multiple rooms, that's a strong hint the issue is systemic and not just a single loose board.
Pay close attention to how the floor feels. If you see any visible sagging or feel a distinct 'bouncy' or 'spongy' sensation when you walk, it's time to put the tools down. These aren't just squeaks anymore; they're potential signs of damaged joists, a failing subfloor, or even foundation trouble that needs an expert eye, and fast.
Knowing When the Job Is Too Big
So, how do you tell the difference between a manageable project and a potential disaster? It’s time to pick up the phone and call a professional when you run into any of these situations:
- The noise is spreading: If the creaking isn't isolated to one spot and seems to be getting worse or appearing in new areas, it points to a larger problem within the entire flooring system.
- You can see the floor sagging: Any dip, bow, or slope in your floor is a major red flag. This often signals serious issues with the joists or support beams holding everything up.
- The floor feels like a trampoline: A soft, spongy, or bouncy feeling underfoot can mean the subfloor is water-damaged, delaminated, or has pulled away from the joists.
- You can't get underneath: Many of the best, most permanent fixes for squeaky floors happen from the basement or crawl space. If you don't have access, your DIY options are severely limited. A pro has specialized tools for top-down repairs.
For issues that might be beyond your comfort zone but don't seem to require a full-blown flooring contractor, you could also consider reaching out to local handyman services for an assessment.
Finding the Right Expert in Cumming, GA
When you do decide to hire a pro, you want someone who will get it right the first time. Here in the Cumming, Johns Creek, and Milton areas, it’s worth taking the time to vet your contractors.
If you live in an older home, ask them specifically about their experience with the construction styles of that era. Always insist on a detailed, written estimate that clearly explains what they think the problem is and how they plan to fix it.
A trustworthy contractor won’t just silence the noise. They’ll diagnose and fix the root cause, protecting the structural integrity of your floor for years to come. That peace of mind is the real investment.
The cost to fix squeaky floors can range anywhere from $200 to over $1,000, depending on the cause and complexity. Of course, major structural work involving sistering joists or replacing a subfloor will be significantly more.
For a complete overhaul or complex repairs, our team at Flacks Flooring has handled just about every flooring challenge you can imagine. We specialize in professional floor installation and can give you a thorough assessment to stop those creaks for good.
Your Questions About Creaky Floors Answered
We’ve walked through the tools, the techniques, and the red flags that mean it's time to call in a professional. Now, let's get into the nitty-gritty and tackle some of the most common questions homeowners in our area have about their noisy floors.
Think of this as the rapid-fire round where we clear up those lingering "what-ifs" and give you the straightforward answers you need to silence those squeaks for good.
Can Humidity Really Make My Floors Creak?
You bet it can. Wood is a living, breathing material. It expands when it’s humid and contracts when it’s dry. Here in Georgia, our muggy summers cause floorboards to swell and push against each other, creating that friction and noise you hear.
Then, when winter rolls around and the air dries out, the wood shrinks. This creates tiny gaps, allowing for just enough movement to cause a creak. The best way to combat this is to keep your indoor humidity stable, ideally between 30% and 50%. A good dehumidifier in the summer and a humidifier in the winter can make a world of difference.
Will a Rug Stop the Squeaking?
Putting a thick rug over a noisy spot can definitely muffle the sound, but it's really just a temporary bandage. It’s not a cure. The rug dampens the noise that reaches your ears, but it does absolutely nothing to fix the real problem, which is always some kind of movement in your flooring system.
A rug can hide the sound, but it can't fix the source. To truly silence a squeak, you have to address the underlying friction or instability between the floorboards, subfloor, and joists.
For a permanent fix, you’ve got to get in there and stabilize whatever is moving.
Is It Safe to Use WD-40 or Oil on a Squeak?
Please don't do this! Never use a wet lubricant like WD-40 or any kind of household oil on a wood floor. It might seem like a logical quick fix, but it will almost certainly cause more harm than good.
These liquids can seep into the wood grain, leaving permanent dark stains, attracting a ton of dirt, and even damaging your floor’s protective finish. If you're going to use a lubricant, always stick to a dry lubricant like powdered graphite or talcum powder. These fine powders can work their way into the seams to reduce friction without causing any damage.
Why Did My New House Start Creaking?
This is a surprisingly common one. It can be frustrating to hear creaks in a brand-new home, but it often happens as the house "settles." The lumber used to build your home retains a bit of moisture, and over the first year or two, that wood slowly dries out and acclimates to its new environment.
As it dries, it can shrink and shift ever so slightly. That movement can create tiny gaps between the subfloor and the joists, which is all it takes to start a squeak. The good news is these are usually minor issues that can be easily resolved with the simple fixes we've already covered, like adding shims or using specialized screws.
At Flacks Flooring, we've seen it all and understand that every home—and every creak—is a little different. If you’ve given it your best shot and still can’t get some peace and quiet, our team is ready to step in. Visit us online to schedule a consultation, and let our experts find a lasting solution for your home.