
A tile to LVP transition is one of the most impactful upgrades you can make to your home. It’s about swapping out old, hard-to-clean tile for luxury vinyl plank that’s not only stylish and comfortable but incredibly durable. We see it all the time—this one change brings a modern, high-end wood look into a space without any of the high-maintenance headaches, making it a fantastic investment for any busy family.
The Growing Shift From Tile to LVP Flooring
Across neighborhoods in Cumming and Johns Creek, we're seeing a major shift in flooring. Homeowners are moving on from traditional ceramic tile and embracing Luxury Vinyl Plank (LVP) in a big way. This isn't just about following a trend; it's a smart, practical decision fueled by LVP's blend of good looks and serious performance. Forget spending Saturdays scrubbing grout lines—the future is a seamless, tough surface that just works.

What's really driving this change? LVP offers the best of both worlds. It perfectly mimics the warm, inviting look of real hardwood—a style that an overwhelming 80% of homeowners say they want—but leaves behind all the stress about scratches, water damage, and fussy upkeep.
Why LVP Is an Ideal Upgrade
For families here in Forsyth County and Milton, the resilience of LVP is a total game-changer. It’s tough enough to handle everything from kids and pets to constant foot traffic. On top of that, its natural water resistance is a huge plus for dealing with Georgia’s humidity, so you don't have to worry about the warping or moisture damage that can ruin other floors. This quality makes it one of the most durable and stylish kitchen flooring options on the market.
Here are the key advantages that keep winning people over:
- Superior Durability: LVP comes with a robust wear layer that shrugs off scratches, scuffs, and stains, so your floors look fantastic for years.
- Complete Water Resistance: Unlike porous grout that can stain or grow mold, LVP's waterproof construction makes it perfect for kitchens, bathrooms, and basements.
- Comfort Underfoot: It's simple—LVP is just warmer and softer to walk on than cold, unforgiving tile. That little bit of give adds a whole new level of comfort to your home.
- Simple Maintenance: A quick sweep and a damp mop now and then are all it takes. Seriously.
A Smart Investment in Your Home
This trend isn’t happening in a vacuum. It shows how homeowners are becoming more focused on performance and long-term value. With LVP holding a commanding 60% market share in the luxury vinyl category, it has become the go-to choice for renovations that deliver both immediate satisfaction and a solid boost to property value.
Choosing to replace tile with LVP is more than just a cosmetic fix. It's an investment in a simpler, more durable lifestyle where you don't have to compromise on timeless style.
2. Choosing the Right Transition Strip for a Flawless Look
You can get the flooring installation 99% right, but if you mess up the transition, it’s the first thing everyone will notice. That little strip of molding is the unsung hero of any tile to LVP transition. It’s what bridges the gap, hides the expansion joint, and ultimately gives your project that clean, professional finish.
Getting this choice right prevents trip hazards, protects the fragile edges of your new LVP, and creates a seamless flow from one room to the next.
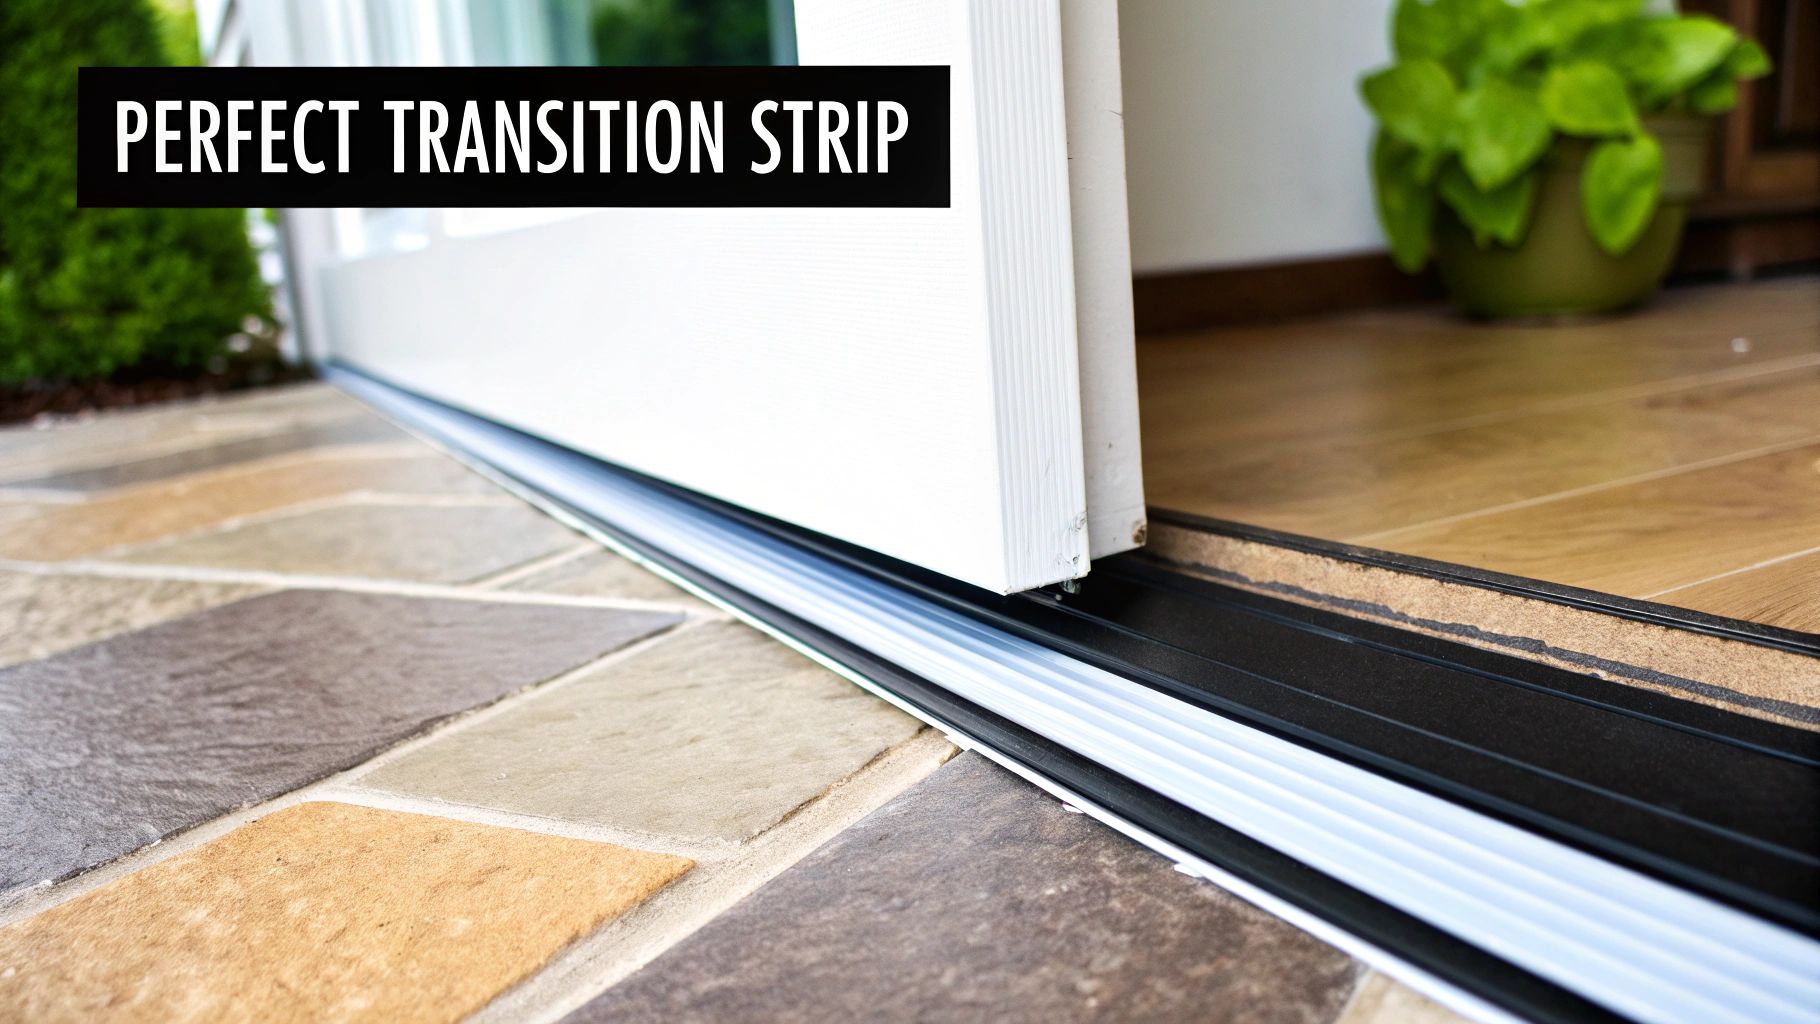
Imagine you're connecting a tiled bathroom in your Johns Creek home to a hallway you’ve just updated with beautiful LVP. If the floors are perfectly flush, a simple T-molding is your go-to. But more often than not, there's a slight height difference. In that case, a reducer is the only way to get a safe and polished result.
Matching Profiles to Your Project
Not all transition strips are created equal. Each profile is designed for a very specific job, and using the wrong one is a classic DIY blunder we see all the time.
-
T-Molding: This is your best friend when you’re connecting two floors of the same height. Shaped like a "T," it drops perfectly into the expansion gap between the tile and LVP, creating a clean, unobtrusive line. It works best when the height difference is less than 1/8-inch.
-
Reducer: A reducer does exactly what its name implies—it reduces the height from one floor to another, creating a gentle slope. If your tile sits a bit higher than your LVP, this is what you need to avoid stubbed toes and create a smooth walk-through. Reducers are the standard for level changes up to about 1/4-inch.
-
Threshold: Think of a threshold as the heavy-duty option. It’s a more substantial piece often used at exterior doorways (like leading to a patio) or when you have a significant height difference that a standard reducer just can't handle.
Choosing the wrong profile can cause real problems down the road. Forcing a T-molding onto uneven floors will cause it to rock, creak, and eventually break. Using a reducer where it isn't needed creates an unnecessary bump. If you want to explore this topic more, we have a detailed guide on flooring transitions that goes even deeper.
To make it even simpler, here's a quick guide to help you pick the right piece for your project.
Transition Strip Selector Guide
This table breaks down which transition profile is best suited for your specific flooring situation.
| Transition Type | Best Used For | Common Height Difference | Pro Tip |
|---|---|---|---|
| T-Molding | Connecting two floors that are the same height. | Less than 1/8" | Ideal for hallways and room-to-room transitions where both floors were installed over the same subfloor. |
| Reducer | Creating a smooth ramp between floors of slightly different heights. | 1/8" to 1/4" | The most common choice when transitioning from a thicker material like tile to a thinner LVP. |
| Threshold | Bridging a significant height difference or finishing at an exterior door. | Greater than 1/4" | Often wider and more durable, making it perfect for high-traffic areas like entryways. |
Choosing the right profile is half the battle, ensuring your new floor is safe, durable, and looks fantastic for years to come.
Don't Forget About Aesthetics and Materials
Function is critical, but you also want the transition to look good. The goal is for it to blend in so well that you don't even notice it's there.
The easiest way to achieve this is by choosing a transition strip that’s color-matched to your LVP flooring. Luckily, most flooring manufacturers offer a full line of coordinating trim pieces, which takes all the guesswork out of it.
Pro Tip: Never trust the lighting in a big-box store. Always bring a spare plank of your LVP with you when you go shopping for trim. Holding the two pieces together in your hand is the only surefire way to know you have a perfect match.
With LVP now dominating the market—holding a massive 60% segment share—the variety of transition options has exploded. You can find everything from vinyl-wrapped MDF to solid metal profiles in finishes like bronze, pewter, or satin nickel.
The right material really depends on your home’s style and the location. For a high-traffic entryway in a busy Milton household, a durable metal strip is a fantastic choice that will stand up to years of abuse. You can discover more insights about floor transition strips on futuremarketinsights.com to see how the market is evolving.
Critical Subfloor Prep for a Perfect Seam
A professional-looking tile to LVP transition has very little to do with the trim piece itself and almost everything to do with the foundation underneath it. I've seen more DIY projects fail at this stage than any other. People get excited about the new floor and rush the prep work, but this foundational step is absolutely non-negotiable if you want a seam that actually lasts.
Before a single plank of LVP touches the floor, the subfloor where it will meet your tile needs to be pristine. Think surgically clean, perfectly level, and completely dry. Any little bit of debris, leftover dust, or old adhesive residue will create problems, causing high spots or preventing the new floor from bonding properly.
Getting the Subfloor Right
Start with a thorough sweep and vacuum, but really focus on the edge where the tile ends. Get down on your hands and knees and feel for any dips, bumps, or unevenness. Even a tiny variation can create a weak spot in the transition, which eventually leads to annoying creaks and movement.
For minor low spots, a self-leveling compound is your best friend. It’s a fantastic solution for creating a glass-smooth surface that ensures your LVP lies perfectly flat. Getting this right is a huge part of proper floor prep for tile and LVP, and it's what sets the stage for a flawless finish.
Here's a rule of thumb I always follow: if you can feel an imperfection with your hand, you will eventually see or feel it through your floor. Take the extra hour to fix it now, because you'll be living with it for years if you don't.
Moisture is the silent killer of flooring projects. Before you do anything else, you have to be sure the subfloor is dry. Learn to spot the critical signs of water damage—things like discoloration or a musty smell. If there's even a hint of moisture, you have to stop and solve that problem completely before moving on.
Prepping the Existing Tile Edge
How you treat the edge of the existing tile is just as important as the subfloor. What you're aiming for is a clean, solid, and perfectly straight line for your new flooring and transition strip to butt up against.
First, go tile by tile along that transition line and check for any that are loose or cracked. A single unstable tile will undermine the entire seam. If you find one, you have to secure it with tile adhesive or replace it. No exceptions.
Once you know the tile is solid, you need to create that clean edge. There are a couple of ways to approach this:
- Work Against a Straight Edge: If you're lucky and the last row of tile is perfectly straight and level, you can often just work directly against it. Make sure you scrape away any excess grout or thin-set mortar first.
- Undercut the Grout Line: This is the pro move for a truly seamless look. I'll often use an angle grinder or an oscillating multi-tool to carefully grind away the grout line. This lets the transition strip sit flush against the tile itself, giving you a much tighter, more integrated appearance.
This kind of meticulous prep work can feel tedious, I get it. But it's what makes the difference between a transition that looks like a weekend project and one that looks like it was installed by a seasoned pro. Trust me, skipping these steps is the single biggest mistake you can make.
Putting It All Together: Installing Your Tile to LVP Transition
You’ve done the hard work of prepping the subfloor and picking out the perfect transition strip. Now for the satisfying part—actually putting it all in place. This is where your planning and patience really come to life, creating that seamless, professional-looking flow between your tile and new LVP.
First things first, let’s talk about that last row of LVP that will sit right next to the tile. You absolutely must leave an expansion gap. Think of it as breathing room for your floor. Here in Georgia, with our notorious humidity swings, materials expand and contract. Without that gap, your beautiful new floor could buckle. The magic number is almost always 1/4-inch.
A rookie mistake I see all the time is people measuring from the wall to the final plank. Don't do that. You need to measure from the edge of the tile to determine the width of that last LVP plank, then subtract that crucial 1/4-inch before you make your cut.
Measuring and Cutting the Transition Piece
With the last LVP plank laid down (but not permanently fixed yet), it's time to measure the transition strip. Place it right in the gap, making sure it sits nicely over both the tile and the LVP. You want an even overlap. Use a pencil to mark exactly where you need to cut. This is especially important in doorways, where you'll have to make precise cuts to fit around the door jambs.
For cutting metal or vinyl-wrapped strips, a miter saw with a fine-toothed blade is your best friend. It gives you a clean, crisp edge and prevents the material from chipping or looking chewed up.
Getting the subfloor right is the foundation for everything that comes next, just as this simple graphic shows.
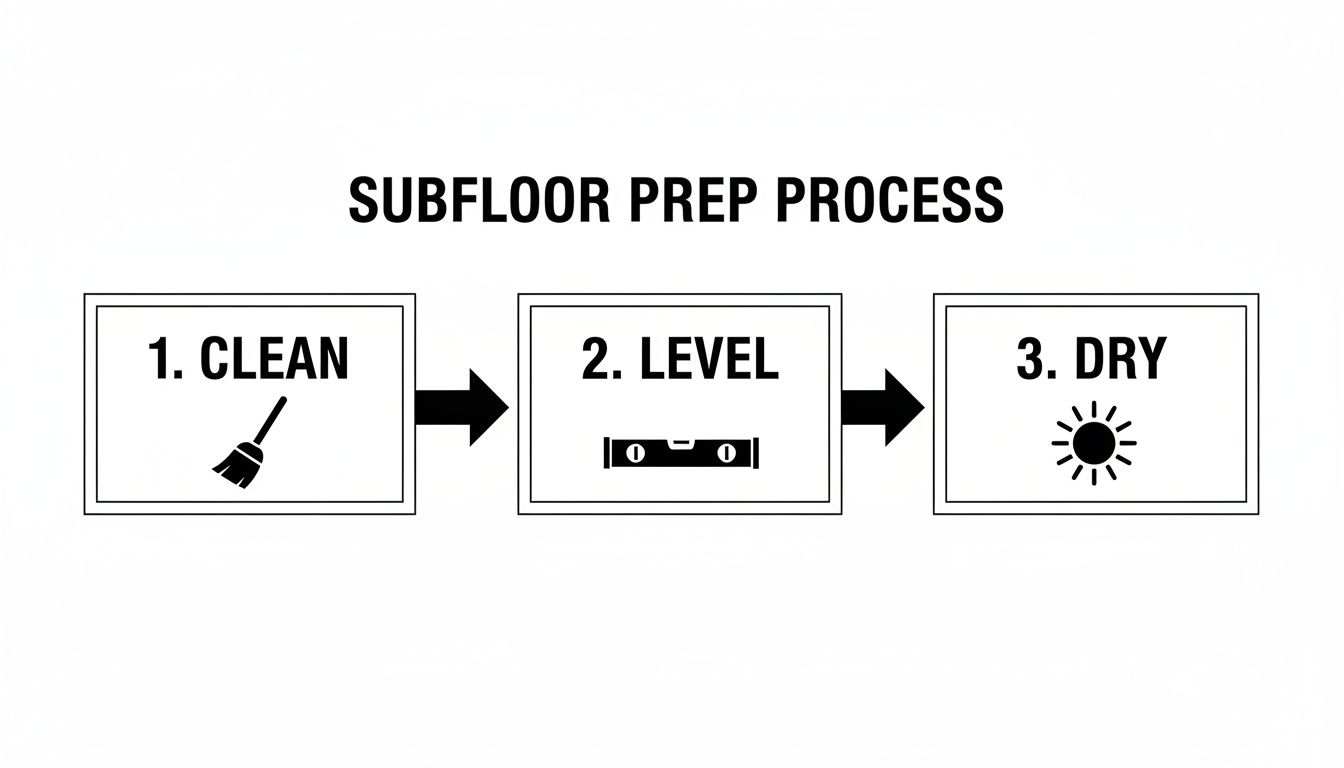
A clean, level, and dry subfloor isn't just a suggestion; it’s the key to a floor that lasts.
Securing the Transition Strip
How you attach the strip really depends on the type you bought. Many of the newer ones come with a metal track system, which is great because you get a clean finish with no visible screws.
- First, cut the track so it fits perfectly inside the expansion gap.
- Next, fasten the track to the subfloor. You can use the screws it came with or, for a really solid hold, a strong construction adhesive.
- Finally, snap in the strip. Just line it up over the track and press down firmly and evenly. You'll hear a satisfying "click" as it locks into place.
What if your transition piece uses adhesive? Be picky. In humid places like Forsyth County, a standard construction adhesive might not hold up. You'll want a high-quality, moisture-resistant polyurethane-based adhesive. It’s a bit more of an investment, but it creates a bond that won't give up.
Here’s a tip from the field: When using adhesive, apply a thin, wavy line (we call it a serpentine bead) to the bottom of the strip. Don't go overboard—the last thing you want is adhesive squeezing out the sides and making a mess on your brand-new floor.
Once the strip is set in the adhesive, place something heavy on it for a few hours. A stack of books or an extra box of flooring will do the trick. This ensures a solid, even bond as the adhesive cures.
For homeowners in the Cumming, Johns Creek, or Milton areas who want to guarantee a perfect finish without the hassle, calling in an expert is never a bad idea. A professional floor installation can provide peace of mind and a flawless result.
Ultimately, installing your tile to LVP transition is all about being methodical. Double-check your measurements, use the right tools, and secure the strip properly. A little extra care here ensures your transition doesn't just look great on day one but holds up to years of foot traffic.
Common Transition Mistakes and How to Avoid Them
Even the most carefully planned tile to LVP transition can hit a snag. I've seen it happen time and time again. Knowing the common pitfalls is the best way to steer clear of them and get a finish that looks like a seasoned pro handled it. These aren't just little cosmetic oopsies; they can cause your entire floor to fail down the road.
The Most Costly Blunders
One of the most frequent—and damaging—mistakes is completely forgetting the expansion gap. LVP needs room to breathe, simple as that. Without that crucial 1/4-inch space along the tile edge, your beautiful new floor can buckle and warp as the temperature and humidity shift in your Cumming home. It’s a tiny oversight that can ruin the whole project.
Another classic error is just grabbing the wrong transition profile. It's easy to think a T-molding works for everything, but if you have even a slight height difference, you need a reducer. Using the wrong piece creates a rocking, unstable strip that’s just waiting to break. Not only is it a trip hazard, but it screams "DIY job gone wrong."
Don't Skip the Finishing Touches
A truly professional installation is all in the details. When you skip the final finishing steps, an otherwise perfect project just looks sloppy and incomplete. These small actions make a world of difference in how the transition looks and how long it lasts.
Make sure you don't forget these final steps:
- Caulk the Edges: Run a thin bead of waterproof, color-matched caulk where the transition strip meets the tile. This creates a watertight seal—absolutely essential in kitchens or bathrooms here in Johns Creek to keep moisture from seeping underneath.
- Hide Your Fasteners: If you used nails or screws, don't leave the heads showing. A tiny dab of color-matched wood putty makes them practically disappear, leaving you with a clean, uninterrupted line.
- Clean Up Like a Pro: Never let adhesive residue or putty smudges dry on your new floor. Grab some mineral spirits or whatever the manufacturer recommends and wipe away any excess immediately. A pristine finish is the goal.
The move toward LVP is huge, with North America holding a 35.4% market share in 2024, thanks to a massive remodeling boom. LVP is so popular because it's virtually waterproof, a must-have feature for our humid Georgia climate. For those high-moisture areas, I always recommend glue-down LVP with a precision reducer for a seamless edge that won't trip anyone up. You can learn more about LVP market trends and findings to see why it's a top choice.
The biggest mistake is just rushing. Take your time with the measurements, the cuts, and especially the finishing work. It’s the final 5% of the effort that creates 95% of that high-end look you’re aiming for.
By sidestepping these common errors, your transition won't just be structurally sound—it will have that polished, flawless appearance that adds real value and enjoyment to your home for years to come.
Your Questions About Tile To LVP Transitions Answered
Tackling a tile to LVP transition can stir up a host of questions—especially if you’re in Cumming or Forsyth County. Getting clear, practical answers transforms a daunting task into something you can handle with confidence. Below, you’ll find the insights homeowners ask us about most often, drawn from real projects in Johns Creek and Milton.
Can I Install LVP Directly Over Existing Tile Floor?
In many cases, yes—you can skip the demo and lay LVP right on top of your tile. I’ve seen this save hundreds in labor and disposal fees. The catch? Your tile must meet a few conditions:
- It’s clean (no grease or debris).
- It sits level, with no dips or bumps.
- There are no cracked or loose tiles.
Grout lines require special attention. Deep or wide grooves call for a self-leveling compound to fill them in before you start—trust me, it’s worth the extra step.
Skipping grout filling is a common mistake. Over time, planks can sag into the grooves, ruining the locking mechanism and ending up with a bumpy floor.
How Do I Handle A Major Height Difference Between Floors?
A significant height gap—say more than 1/2-inch—demands a proper transition strip. Here’s what works best:
- Reducer Strip: Creates a smooth slope between two different heights.
- T-Molding: Ideal when rooms are the same height but need a neat break.
- Custom Threshold: Perfect for high-traffic entries like patio doors.
Measure the exact height difference before you buy. I keep a digital caliper in my toolbox for this—accuracy matters if you want that seamless look and a safe walking surface.
How Much Of An Expansion Gap Do I Need?
LVP is a “floating” floor. It needs room to flex with Georgia’s temperature swings. Always leave a 1/4-inch expansion gap around the perimeter where tile meets your new planks.
- Prevents buckling or separation
- Allows seasonal movement
- Hidden neatly by your transition strip
That small void is crucial—it keeps your floor looking pristine for years.
For a flawless finish—from subfloor prep to the final transition profile—rely on the pros at Flacks Flooring. Whether you’re in Cumming, Johns Creek, or Milton, we’ve got the expertise you need. Get personalized guidance at Flacks Flooring.