
You've just picked out the perfect laminate flooring—the color is right, the texture feels great, and you can already picture it in your home. But there's one small detail that makes a world of difference between a good installation and a great one: the transition pieces.
These are the unsung heroes of a flooring project. They’re the essential finishing touches that bridge gaps between rooms, handle tricky changes in floor height, and give every edge a clean, polished look. They're what separate a DIY job from a professional, long-lasting installation.
The Real Purpose of Flooring Transitions
Most people don't think about flooring transitions until the very end, but they are the secret ingredient to a durable and safe laminate floor. Think of them like the frame on a beautiful painting; they pull the entire look together. Without the right transitions, even the most stunning laminate can look unfinished and become vulnerable to damage.
But it's not just about looks. These components serve several critical functions that protect your investment and keep your home safe.
Why Transitions Are Non-Negotiable
Laminate is what's known as a "floating floor." This means the planks aren't glued or nailed down to the subfloor, which allows them to expand and shrink with seasonal changes in temperature and humidity. To accommodate this natural movement, installers leave a small expansion gap around the perimeter of the room.
This is where transitions come in. They are specifically designed to cover those expansion gaps, stopping dirt and dust from getting in while still giving the floor the room it needs to "breathe." If you skip this crucial step, you’re setting yourself up for problems like buckling, warping, or separating planks down the road.
Transitions also solve the practical challenges of a real-world home layout. They create a smooth, safe path from one room to the next, getting rid of any abrupt edges that could be a trip hazard. This is a huge deal in homes with kids, older family members, or anyone with mobility concerns. By creating gentle ramps or level bridges between surfaces, transitions make your home safer and more comfortable for everyone.
Here’s what these essential pieces actually do:
- Manage Expansion: They neatly conceal the required expansion gaps, preventing damage as your floor naturally shifts.
- Connect Different Floors: They create a seamless link between your laminate and other flooring like carpet, tile, or vinyl, even if the heights don't perfectly match.
- Eliminate Trip Hazards: They provide a gradual, safe change from one surface to another, drastically reducing the risk of falls.
- Protect Your Floor's Edges: They act as a shield for the vulnerable edges of your laminate planks, preventing chipping and wear in busy spots like doorways.
At the end of the day, using the right transition is a clear sign of a quality job. It shows real attention to detail and a commitment to making your floors last. For homeowners in Cumming, Forsyth County, and surrounding areas, understanding what laminate flooring is and the role transitions play is the first step to a beautiful floor you'll love for years. Of course, once the floor is in, protecting your floors from furniture is the next step to keeping them looking great.
Understanding the Different Types of Laminate Transitions
Choosing the right transitions for your laminate flooring can feel a bit like a puzzle, especially when all the pieces look so similar. But each molding and strip is designed for a very specific job. Using the wrong one won't just look off—it can actually damage your beautiful new floors.
Let’s think of these pieces less by their technical names and more by the problem they solve. You wouldn't use a screwdriver to hammer a nail, right? The same logic applies here. Each transition has a unique shape and purpose, built to create a safe, seamless, and long-lasting connection between different areas of your home.
This quick decision-making flowchart is a great way to see which transition you need at a glance.

As you can see, the process starts with one simple question: what kind of flooring junction are you dealing with? From there, it guides you straight to the perfect solution, whether you're connecting level floors in a doorway, stepping down to a different surface, finishing an edge, or working on stairs.
To make it even easier, here’s a quick-reference table that breaks down where and when to use each type.
Quick Guide to Laminate Transition Types
| Transition Type | Primary Use Case | Common Locations |
|---|---|---|
| T-Molding | Connecting two hard floors of the same height. | Doorways between rooms (e.g., hallway to bedroom), large rooms requiring an expansion joint. |
| Reducer | Creating a smooth transition from laminate down to a lower floor. | Where laminate meets vinyl, low-pile carpet, or concrete. |
| End Cap | Finishing the edge of the laminate where it stops. | Against sliding glass doors, fireplace hearths, or next to high-pile carpet. |
| Stair Nose | Providing a durable, rounded edge for each step. | The front edge of stair treads and landings. |
This table serves as a handy cheat sheet, but let's dive into exactly how each of these critical pieces works.
The T-Molding Bridge
A T-molding is your go-to piece for connecting two hard surface floors that are at the same height. If you look at it from the side, its "T" shape is obvious. The top of the "T" rests on both floors, covering the gap, while the stem fits perfectly into that all-important expansion space between them.
Think of it as a small, elegant bridge spanning the tiny gap between your floors. It's most often used in doorways where you have laminate on both sides, like going from a hallway into a bedroom. It creates a clean, continuous look while giving both floors the freedom to expand and contract naturally with changes in humidity.
The Reducer Ramp
What happens when your new laminate meets a floor that sits a bit lower, like vinyl or a low-pile carpet? That's a job for a reducer. A reducer is designed to create a gentle, smooth slope from the higher laminate down to the lower flooring.
It’s basically a miniature ramp, but its purpose is huge: it eliminates a trip hazard. Without it, you’d have an abrupt, sharp edge just waiting to catch a toe. You’ll see reducers used all the time in places like a kitchen that opens into a vinyl laundry room or a living room that connects to a carpeted den.
The End Cap Finish Line
An end cap, which is sometimes called a square nose, is all about creating a clean, finished border where your laminate flooring simply stops. It provides a crisp, squared-off edge against things like walls, doors, or other obstacles where another floor doesn't begin.
This piece is the period at the end of the sentence—it signals a final, definitive stop. You’ll need an end cap in several key places:
- Up against sliding glass doors or exterior door thresholds.
- Next to the non-combustible base of a fireplace hearth.
- Where laminate meets very thick, high-pile carpet that’s too tall for a reducer to handle gracefully.
By using an end cap, you protect the exposed edge of your laminate from getting chipped or damaged by daily foot traffic and vacuum cleaners.
In the global laminate flooring market, the right transitions are key to a floor's longevity. For homeowners renovating in Johns Creek or Milton, it's worth knowing that proper transitions can prevent up to 40% of common wear issues like edge chipping. These small pieces do a big job, ensuring seamless level changes and reducing trip hazards. You can learn more about industry trends in detailed reports on the global laminate flooring market.
The Stair Nose Guardian
When you're installing laminate on stairs, you absolutely need a special component called a stair nose. This piece has two incredibly important jobs: safety and durability. It creates a rounded, finished edge on each step, covering the sharp corner where the flat part of the stair (the tread) meets the vertical part (the riser).
Think of the stair nose as the guardian of your staircase. It absorbs the impact of every footstep, protecting the laminate edges from chipping and wearing down over time. Even more critically, its rounded profile provides better grip and a clear visual edge for each step, which significantly reduces the risk of slips and falls. This isn't just a decorative piece—it's a non-negotiable part of a safe and proper stair installation.
Choosing the Right Material and Finish
Once you've figured out which type of transition strip you need, the next big decision is what it’s made of. This is just as critical for a long-lasting, great-looking floor. Think of it like picking the perfect hardware for new kitchen cabinets—the right choice blends in beautifully, while the wrong one sticks out like a sore thumb. Your decision here affects not just the final look but also how well your floors stand up to daily life.
You really have to balance style with practicality. For instance, a transition in a busy entryway is going to take a much bigger beating than one tucked away in a closet. And if you’re putting one down near a bathroom or kitchen, it absolutely has to handle a little moisture without swelling up.

Common Transition Materials
When you start shopping around for transitions for laminate flooring, you’ll notice they generally come in a handful of materials. Each one has its own pros and cons, making it better for certain spots in your home.
- Laminate-Wrapped MDF: This is easily the most common choice, and for good reason—it’s designed to be a perfect match for your laminate planks in both color and texture. The core is just Medium Density Fiberboard (MDF) wrapped in the same decorative paper as your floor, giving you a completely seamless look.
- Solid Hardwood: If you want something a bit more classic and bulletproof, solid wood transitions are fantastic. You can stain them to get a close match to your laminate, and they are incredibly tough against wear and tear. They’re a great upgrade for high-traffic doorways.
- Aluminum: For a more modern, clean aesthetic, you can't beat metal. Aluminum transitions are exceptionally durable and are the go-to choice for joining laminate to a concrete slab or for use in commercial spaces. You can find them in finishes like brushed nickel, bronze, or simple black.
- Vinyl: Vinyl transitions are flexible, waterproof, and super practical. This makes them the obvious solution for moisture-prone areas like bathrooms, laundry rooms, and basements. They’re also great for bridging floors that aren't perfectly level with each other.
Here in Georgia, especially with renovation booms in places like Cumming, getting this right is huge. The HDF laminate flooring market data shows that using the right transition between laminate and tile can prevent 45% of buckling risks that come from our notorious humidity swings. Pros also know that using universal aluminum transitions can save 15-20% on material costs, since they work with 95% of HDF planks out there.
To Match or to Contrast
This is where your personal style comes into play. Do you want your transition pieces to disappear into the floor, or do you want them to make a statement? There's no wrong answer here; it's all about the final look you're going for.
A matched finish is the go-to approach for most people. Using a transition that perfectly mimics the color and grain of your laminate creates an uninterrupted flow from one room to another. This little trick makes your space feel bigger and more connected because your eye isn't stopping at every doorway.
Pro Tip: If you're going for a match, always buy the transitions from the same company that made your flooring. One brand's "Golden Oak" can look totally different from another's, and even slight color variations will be noticeable once installed.
On the flip side, a contrasting finish can be a really cool design choice. A sleek black or brushed silver transition can act as a modern accent, framing your flooring. This approach looks especially sharp in contemporary or industrial-style homes where mixing materials and highlighting clean lines is part of the design.
So, how do you decide? Think about these things:
- Your Home's Style: A traditional home usually looks best with perfectly matched, wood-look transitions. A modern loft, however, could be elevated by the crisp, clean look of a metal strip.
- The Room's Purpose: In an open-concept living area, matching is almost always the way to go for a cohesive feel. But to create a clear boundary between a kitchen and a mudroom, a contrasting threshold can work wonders.
- Your Own Taste: At the end of the day, it’s your home. Do you prefer a seamless, flowing look, or do you like deliberate accents that draw attention to the details? Your answer will point you to the perfect finish.
Getting Ready for a Flawless Installation
A professional-looking laminate floor doesn't happen by accident. The real secret to a stunning, long-lasting finish is all in the prep work you do before a single transition piece is even touched. It's about more than just a quick sweep-up; you're creating the perfect canvas for your new floor.
Think of it like letting a good steak rest before you slice into it. Your new laminate planks and all the transition moldings need time to get used to their new home. We call this acclimation, and it’s a step you absolutely cannot skip.
Let Everything Acclimate Together
First things first: bring the unopened boxes of flooring and all your transition pieces into the room where they'll be installed. Just let them sit there for a good 48-72 hours. This gives the materials time to expand or contract and get in sync with your home's unique temperature and humidity.
Why does this matter so much? Imagine installing cold, shrunken planks in a warm, humid room. As they warm up, they'll expand, and that pressure can cause buckling, squeaking, and all sorts of problems down the line. Skipping this simple waiting period is one of the most common DIY blunders we see.
Acclimation is really just giving your flooring a chance to get comfortable before you lock it into place. A couple of days of patience now will save you from a world of headaches later on.
Your Subfloor Has to Be Perfect
Your beautiful new floor is only as good as what’s underneath it. A clean, dry, and perfectly level subfloor is the foundation for success. The smallest bump or dip can telegraph right through to the surface, making your floor feel spongy or causing transition strips to wobble.
Run through this quick subfloor prep checklist:
- Get it Spotless: Sweep, then vacuum everything. Even a tiny pebble or clump of drywall mud left behind will create a high spot that you’ll feel with every step.
- Check for Level: Grab a long, straight board (a level is even better) and check for high spots and dips. The industry standard is no more than a 3/16 of an inch variation over a 10-foot span.
- Fix the Flaws: Use a scraper to knock down any high spots. For any low spots, a self-leveling compound is your best friend. A flat surface is non-negotiable for getting reducers and T-molding to sit perfectly flush.
And don't forget the unsung hero of any laminate installation: the underlayment. It provides a moisture barrier, muffles sound, and adds a bit of cushion underfoot. If you're unsure which one to choose, our guide on padding for laminate floor installation can help you get started on the right foot.
Master Your Measurements and Cuts
When it comes to transitions, precision is everything. A sloppy cut in a highly visible spot like a doorway can cheapen the look of the entire room. So, take a breath and remember the carpenter's creed: measure twice, cut once.
Carefully measure the width of the doorway or the length of the wall where the molding will go. For doorways, make sure you're measuring right down at the floor level, between the door jambs. Transfer that exact measurement to your transition piece and mark a crisp, clear line for your cut.
Want a pro tip for a truly seamless look? Undercut your door jambs. Instead of trying to cut the molding in a tricky shape to fit around the door frame, you cut a tiny notch out of the bottom of the frame itself. This lets the transition piece slide right underneath for a clean, built-in appearance with zero gaps. It’s a little extra effort that makes a massive difference.
Navigating Special Flooring Situations
Let's be honest, not every flooring project is a straight shot across a perfect, square room. Homes are full of quirks—moisture-prone bathrooms, tricky layouts, and oddball walls—that demand more than a standard approach. These are the spots where a flooring job can either shine or fall flat, and it all comes down to the details.
These situations call for more than just a standard T-molding. You need to anticipate the challenge and pick the right tool for the job. Think of it this way: you wouldn't use a screwdriver to hammer a nail. Likewise, using the wrong transition piece can compromise the safety, durability, and overall look of your beautiful new floor.
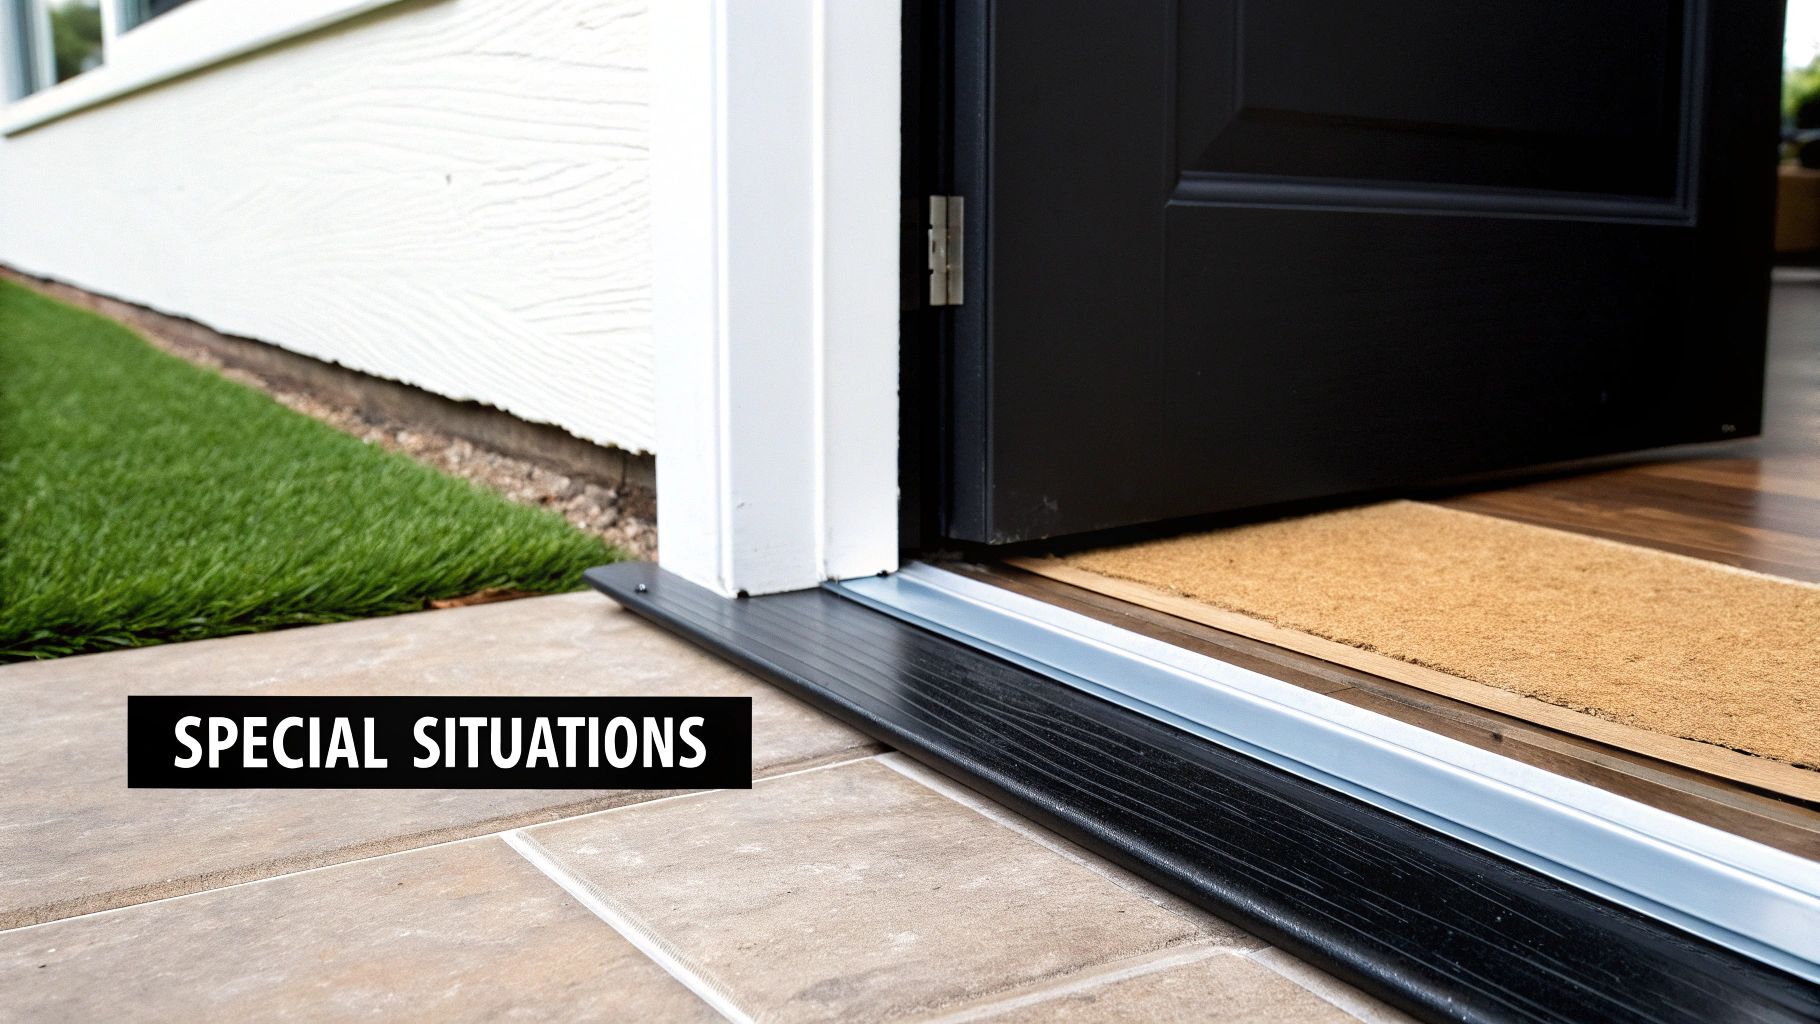
Transitions in Moisture-Prone Areas
When you're laying laminate in a bathroom, laundry room, or basement, moisture is the enemy. Even if your laminate planks are labeled "waterproof," the seams and transition points are the weak links in the chain. Water always finds a way, and if it seeps under the floor, it can wreak havoc on your subfloor.
To stop water in its tracks, you have to use a transition made from a completely waterproof material. No exceptions.
- Vinyl Transitions: These are your best bet for any wet area. Vinyl won't swell, warp, or rot when it gets wet, creating a reliable seal at doorways and thresholds.
- Aluminum Transitions: Metal is another fantastic waterproof choice. It offers a clean, modern look while forming an impenetrable barrier against moisture.
Whatever you do, don’t even think about using standard MDF-core transitions here. They act like a sponge, soaking up any drop of moisture they find, which will quickly lead to ugly swelling and a ruined installation.
Ensuring Safety and Accessibility
A great floor isn't just about looks; it's about being safe and comfortable for everyone who lives in the home. If you have family members who use walkers or wheelchairs, or even if you just want to eliminate trip hazards, choosing the right transition is a crucial safety decision. This is exactly what ADA-compliant transitions are designed for.
These pieces are engineered with a very gentle slope, making the move between different floor heights smooth and barely noticeable. Look for low-profile reducers or dedicated ramped thresholds that meet specific accessibility guidelines. A ramped transition is a must for any height change over a quarter-inch, as it ensures easy passage and prevents dangerous trips and falls.
In areas like Cumming, where many homes undergo renovations annually, transitions such as overlap reducers between laminate and low-pile carpet prevent 35% of delamination failures by distributing foot traffic evenly. For renters, these transitions install in under 30 minutes per doorway, offering reversible changes without subfloor damage. Real estate agents in Johns Creek report that properties with seamless laminate-to-hardwood transitions sell faster. You can find more details about how these elements impact the market in studies about wood and laminate flooring trends.
Handling Concrete Subfloors and Curved Walls
Working with a concrete slab subfloor—common in basements and ground-level rooms—presents its own challenge: hidden moisture. Concrete is porous and can pull moisture up from the ground. That’s why a 6-mil vapor barrier is absolutely non-negotiable before you even think about putting down underlayment. When you go to install your transition track, use proper concrete screws and seal each screw hole with silicone to keep that moisture barrier intact.
And what about those beautiful curved walls or arched doorways? A standard, rigid transition piece just won't cut it. The solution here is a flexible transition strip, typically made from a pliable PVC or rubber. You can gently bend these strips to follow the exact contour of the wall, giving you a truly custom, high-end finish that looks seamless. Getting these tricky spots right is a big part of learning how to transition between two different wood floors or other surfaces like a pro.
When to Call in a Pro for Your Installation
There's a special kind of pride that comes from a DIY project done right. But let's be honest, some jobs are just better left to people who do this day in and day out. While popping in a simple T-molding seems straightforward, certain situations can quickly spiral from a fun weekend project into a frustrating and expensive mess.
Knowing when to hang up your toolbelt and call a professional is one of the smartest decisions you can make to protect your flooring investment.
Think of it this way: a professional installer has already made all the mistakes on someone else's floor. They've seen every weird angle, every uneven subfloor, and every tricky doorway you can imagine. They know how to anticipate problems you wouldn't even see coming.
Red Flags That Signal It's Time for an Expert
Some installations have "call a pro" written all over them. If your project involves any of the following, it’s a good sign you should get a quote from a flooring contractor in the Cumming or Johns Creek area.
- Big Height Differences: A standard reducer can handle a small drop, but what happens when your new laminate meets a thick, vintage tile or a super plush carpet? A pro knows how to build a smooth, gradual transition that won't become a stubbed toe magnet. They can even ensure it's ADA-compliant, which is a major safety plus.
- Weird Angles and Curves: Trying to fit a transition piece against a curved fireplace hearth, a bay window, or an oddly angled wall is a recipe for disaster with a standard miter saw. Pros have the specialized tools and scribing techniques to make those cuts look seamless and tight.
- Subfloor Problems: If your subfloor feels spongy, has major dips and peaks, or shows old water stains, that’s a problem that has to be fixed before the first plank goes down. A professional will properly diagnose and fix the subfloor, giving your new flooring the solid foundation it needs to last.
- Stairs, Stairs, Stairs: This one is a biggie. Installing stair nosing is critical for safety. Every single piece has to be cut perfectly and glued and nailed securely to withstand constant foot traffic. A small mistake here isn't just cosmetic; it can be downright dangerous.
Hiring a professional isn't an admission of defeat; it’s an investment in the outcome. A pro installation not only guarantees a beautiful finish but is often required to keep your flooring manufacturer’s warranty intact. Many warranties are voided by improper installation.
What You're Really Paying For
Beyond just the labor, a professional installer brings an incredible amount of value and peace of mind. They show up with everything needed to do the job right, from specialized saws for undercutting door jambs to the right fasteners for your specific subfloor.
Their experience means they work efficiently, saving you from a project that drags on for weeks. For homeowners in Forsyth County and Milton, a floor installed by a true craftsman adds tangible value to your home. It’s a detail that buyers notice and appreciate.
While the DIY spirit is fantastic, knowing when to tag in an expert ensures your beautiful new floors will look amazing and perform perfectly for years.
Your Top Questions About Laminate Transitions, Answered
Even the most carefully planned flooring project can leave you with a few nagging questions. Getting the right answers can be the difference between a job you're proud of and one that causes headaches down the road. Let's tackle some of the questions we hear most often about transitions for laminate flooring.
Can I Just Use One Type of Transition Everywhere?
It's tempting to think you can simplify things by buying one style of transition in bulk, but that's a recipe for a bad finish. It’s better to think of these pieces as specialized tools in a toolbox; each one is designed to solve a very specific problem.
A T-molding is perfect for connecting two floors of the same height, but it’s completely wrong for sloping down to a lower vinyl floor in your bathroom—that’s a job for a reducer. Using the wrong piece not only looks unprofessional, but it can create a serious trip hazard and even damage your flooring planks over time. The best approach is always to look at each doorway and flooring junction individually and pick the right piece for that specific spot.
Is an Expansion Gap Really That Important?
Absolutely. This is one step you simply cannot skip. In fact, leaving a proper expansion gap is probably the single most important part of any laminate installation. Laminate flooring is a "floating" system, which means it isn't nailed or glued down. This allows it to expand and contract naturally as the temperature and humidity in your home change throughout the year.
That little gap you leave around the edges of the room is the "breathing room" your floor needs to move without causing problems. Without it, the expanding planks have nowhere to go. They'll push against each other, causing the floor to buckle, warp, or form ugly peaks right in the middle of your room. The transition pieces are what cover up this gap, giving you a clean look while letting your floor do its thing.
How Do I Keep My Transitions Clean?
Good news! Taking care of your transitions is just as easy as maintaining the rest of your laminate floor. A little bit of routine care is all it takes to keep them looking sharp.
Here are a few simple tips:
- Sweep or Vacuum Often: Grit and dust love to collect right along the edge of a transition strip. A quick pass with a broom or vacuum prevents that buildup from scratching the finish.
- Wipe with a Damp Cloth: When they need a proper cleaning, just use a microfiber cloth lightly dampened with water or a pH-neutral cleaner made specifically for laminate.
- Stay Away from Harsh Cleaners: Never use abrasive pads, steel wool, or harsh chemicals. You also want to avoid soaking the area with water or using any kind of wax or oil-based soap. These can eat away at the protective finish, causing permanent damage.
Stick to these simple habits, and your transitions will look just as good as your floor for years to come.
For homeowners in Cumming, Johns Creek, and Milton, getting these finishing touches right is what separates an okay floor from a great one. If you're dealing with a tricky layout or just want the peace of mind that comes with a flawless, professional finish, the experts at Flacks Flooring are here to help. See our huge selection of quality flooring and matching transitions at https://flacksflooring.com.